

Exploring Utah’s National Parks along with some of their state parks was a trip to remember.
Day 1 – Salt Lake City
Landing in SLC, we were excited to start our road trip through southern Utah exploring the National Parks and a few State Parks. Landing at 10:30am, we had a little time to kill before we could pick up the RV at 1:30pm. We had arranged to drop our bags at Cruise America RV Rental in order to explore the city.
Exploring Salt Lake City
After dropping our bags at Cruise America RV Rental, we grabbed an Uber with our first stop being Temple Square as one of the more popular Salt Lake City attractions. We were hoping to make the free tour and organ concert prior to lunch.
Mormon Temple Tabernacle organ concert
The Mormon Tabernacle Choir organist performs a free organ concert every day (Monday through Saturday) at noon and Sunday’s at 2pm in the Tabernacle building.
Tip: While planning your visit, check the Tabernacle Choir website as the schedule does change occasionally for special events.
Upon arriving at Temple Square, we found the Tabernacle building which was very close to the South and West Temple streets entrance. We arrived just a few minutes before noon, which was perfect timing.
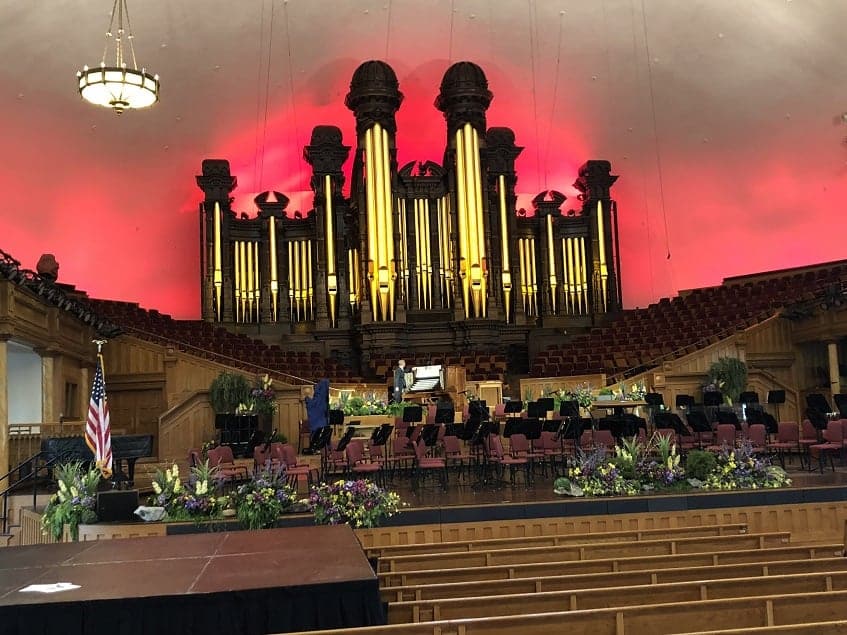
Walking into the Tabernacle, we learned no pictures are allowed until after the concert. The organist provided some interesting facts about the Tabernacle including the acoustics and how easy it is to hear in the building without any special electronics. He dropped a pin which could be heard from the very back. It was also interesting seeing the changing light colors to the rhythm of the music.
The concert lasted about 30 minutes playing 4 songs. This is typical length of the free daily concerts.
After the show, we hung around for a few minutes for some quick pictures.
Walking tour of Temple Square
Our original plan was to take the free-guided tour of the Temple Square following the concert. However, we realized time didn’t allow for it, so we opted for the self-guided tour with hitting the main stops.
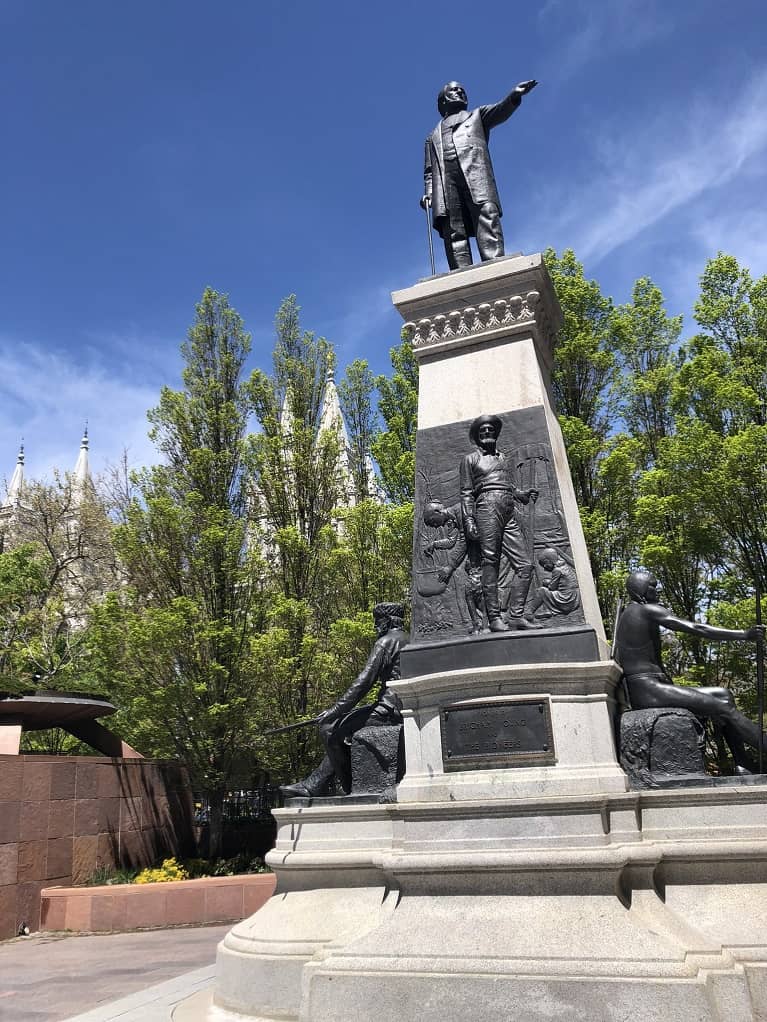
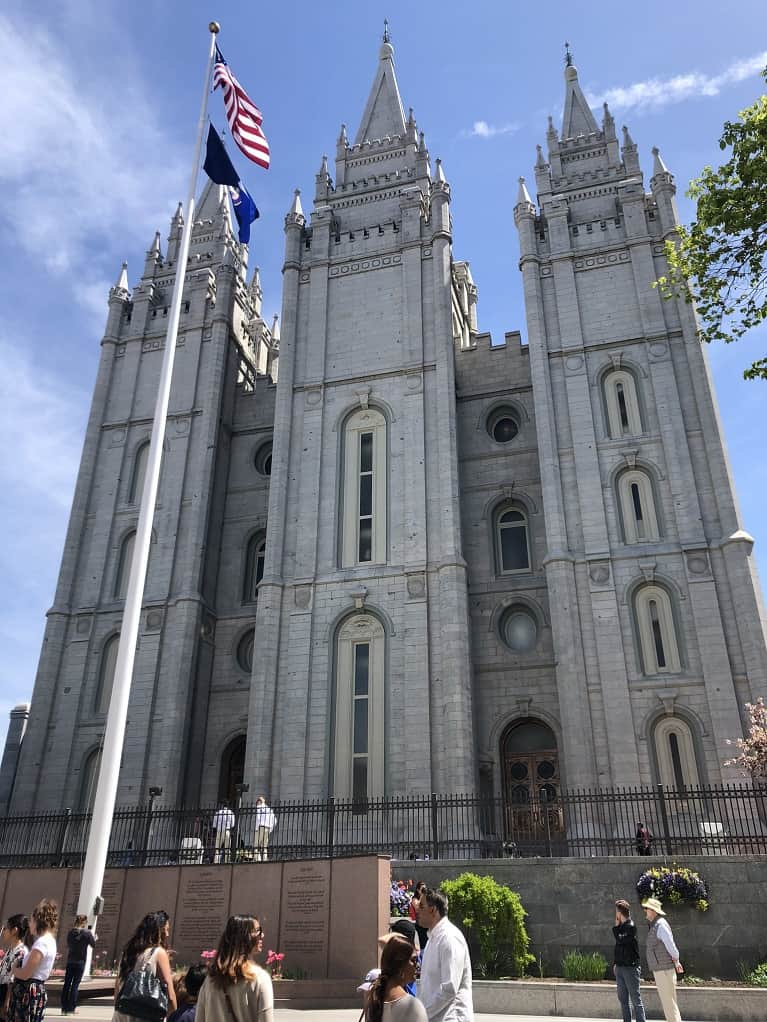
Highlights included the beautiful flowers almost everywhere you looked, Assembly Hall, Salt Lake Temple and the Beehive House. If you must cut your time short, these are the places I would recommend seeing before departing the Temple Square.Tip: If time allows, take the guided tour. The free guided walking tours of the square meet just outside the Tabernacle at the flagpole at the top of each hour. Check their website for hours as it does change with the season.
The Copper Onion
After finishing up our tour of the Temple Square, we walked a few blocks over to The Copper Onion for lunch as it had been recommended to us as one of the best restaurants in Salt Lake City. We had fled the already hot temperatures of Atlanta and enjoyed sitting in the fresh air with the doors being open.
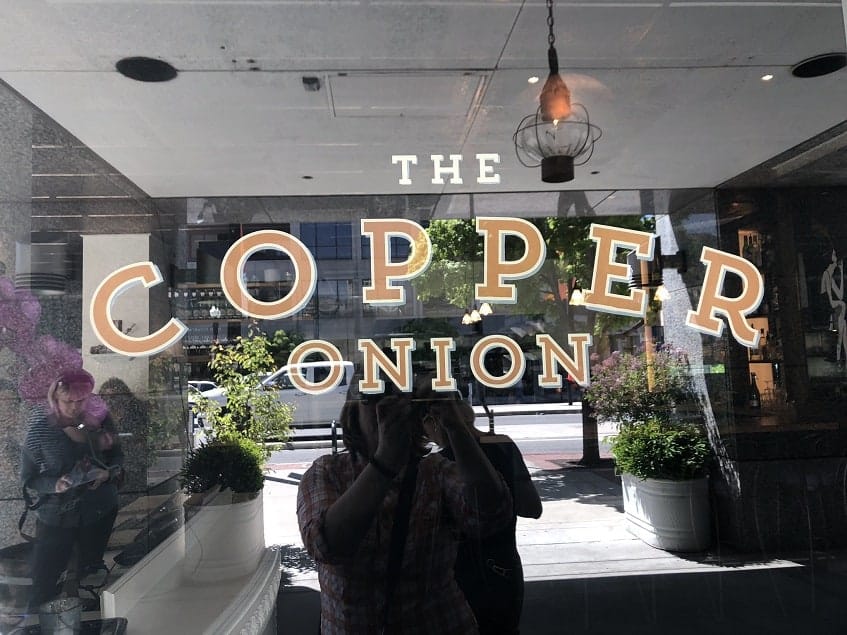
We got off to a rough start with our server – we want in, want out. I can blame him for getting a little annoyed with us, but he soon realized we meant no harm. The food was delicious, and the drinks went down easily. Between the three of us, we had the French Dip and Burger. We gave all 2 thumbs up!
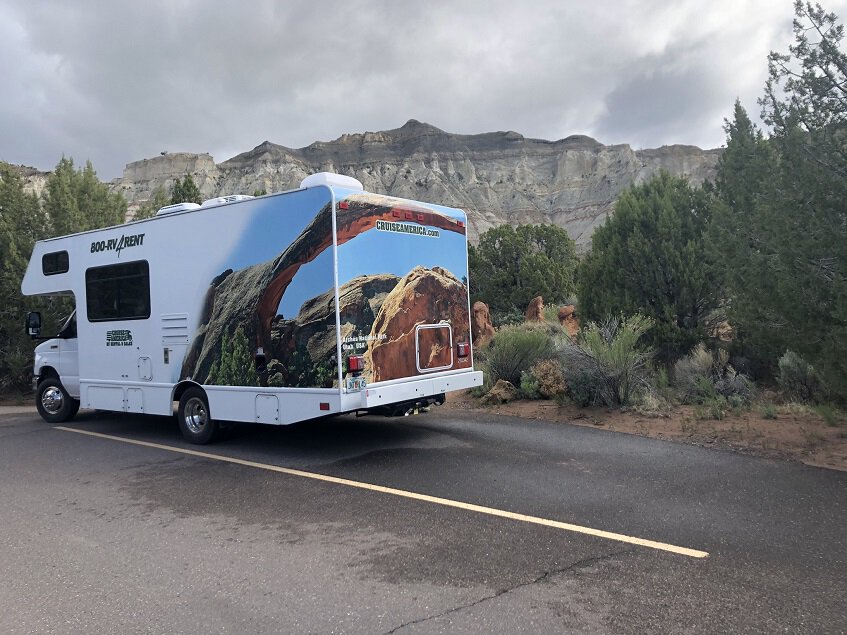
RV’ing
After lunch, we grabbed an Uber to make our way back to Cruise America RV Rental. It was past time to pick up the RV and make our way toward Moab.
At Cruise America, we watched a video and had a walking tour of the RV. Keep in mind, this was all our first time driving a RV.
Tip: If you are preparing for you first RV trip, here are some ideas for a RV road trip packing list. Also, not sure where you want to go in Utah. Read about Can’t Miss thing In Utah!
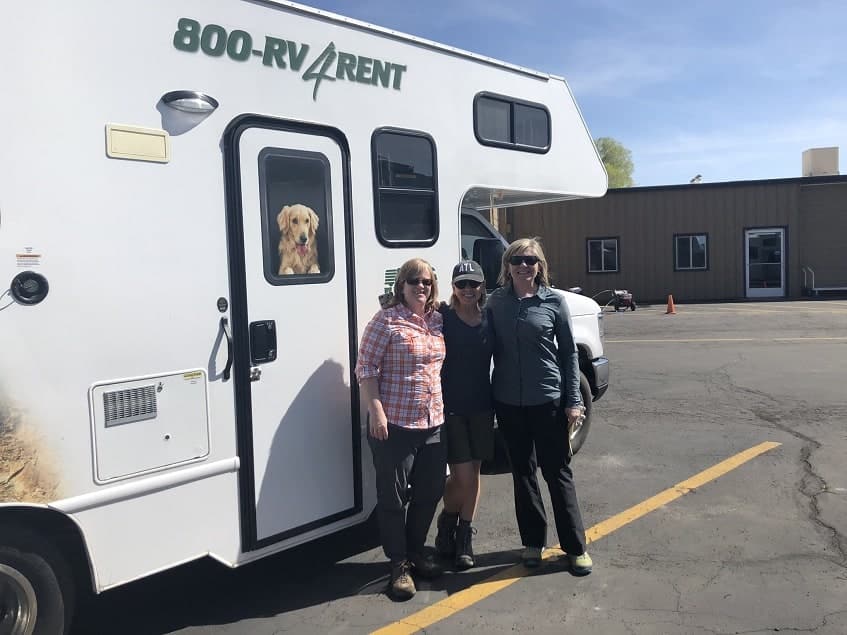
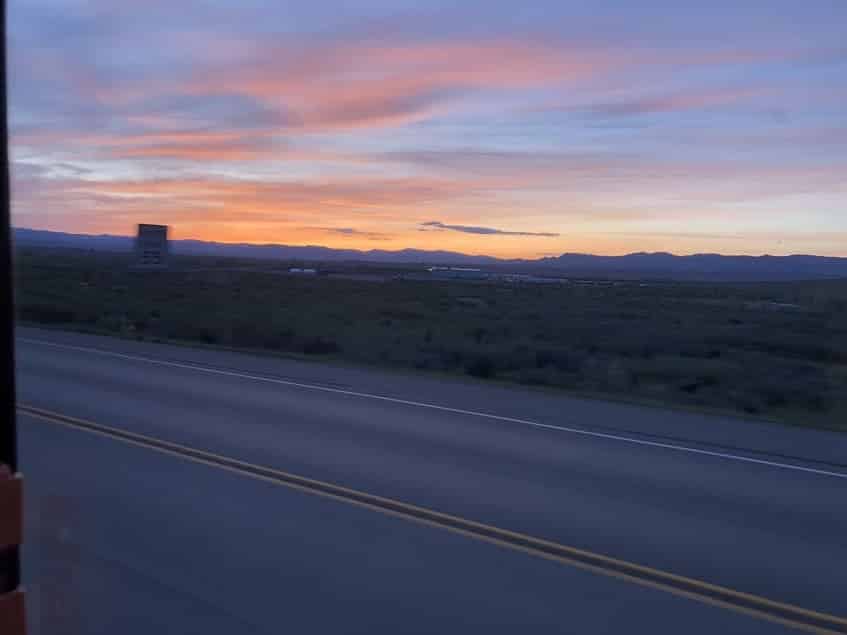
One more stop at the grocery store for the week’s grocery supplies before heading out. There was a Walmart close, so we stopped there and bought our groceries. By the time we hit the road for Moab, it was 6pm. Our original plan was to arrive in Moab before dark – that was not going to happen.
As we made our way out of Salt Lake, we realize Dead Horse Point State Park closes at 10pm and we were not going to make it. We start making phone calls but was unable to get anyone on the phone. Our anxiety rose a little along with our need for the bathroom, but we drove on hoping we could still get into the park.
Arriving at Dead Horse closer to 10:30pm, we were relieved to see the park gates were open. We found our camping spot with ease. Settled in for the night, hoping for a good night sleep before our next day’s adventure.
Tip: While we had a great day, there is one big thing we would do differently next time. If your schedule allows, fly into Salt Lake City the night before to allow more time for the Temple Tour and the organ concert. This would allow for a more leisurely time in SLC, but also would have given us more time in evening at Dead Horse Point State Park.
Day 2 – Dead Horse Point State Park and Canyonlands National Park
We woke up early since our bodies were still on east coast time. Looking out my window I realized why I love the dessert – the sunrises!
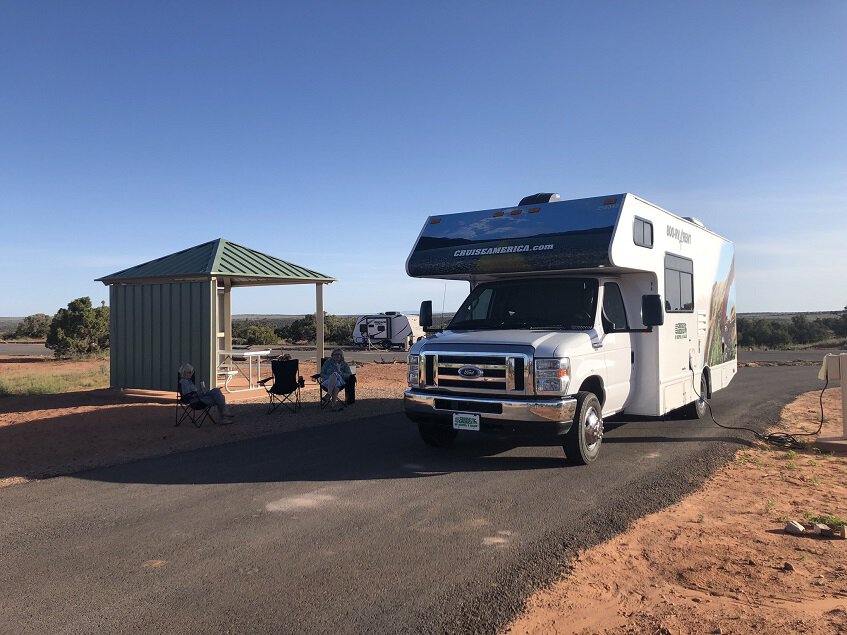
Since we were all awake, we decided to get our day started – first with coffee sitting outside enjoying the nice cool temperature.
Exploring Dead Horse Point State Park
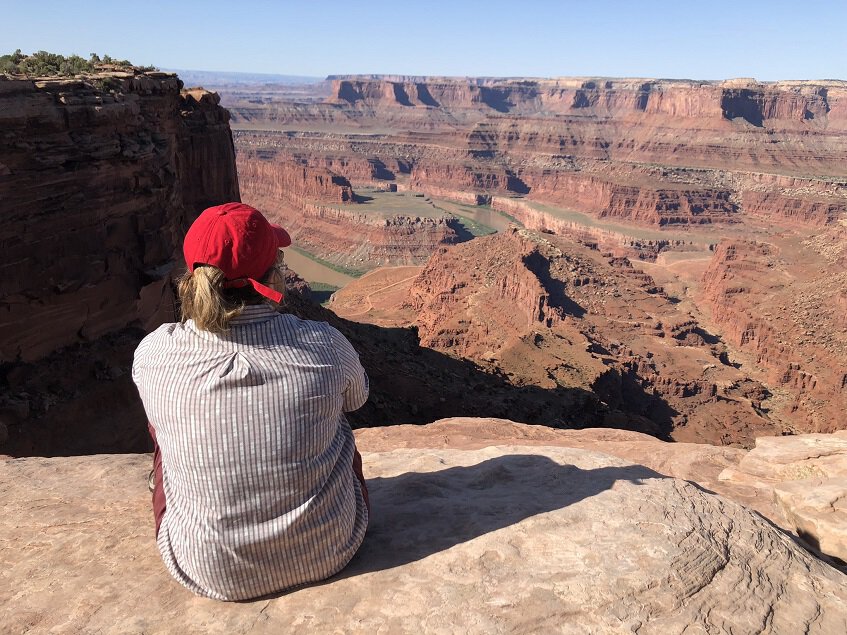
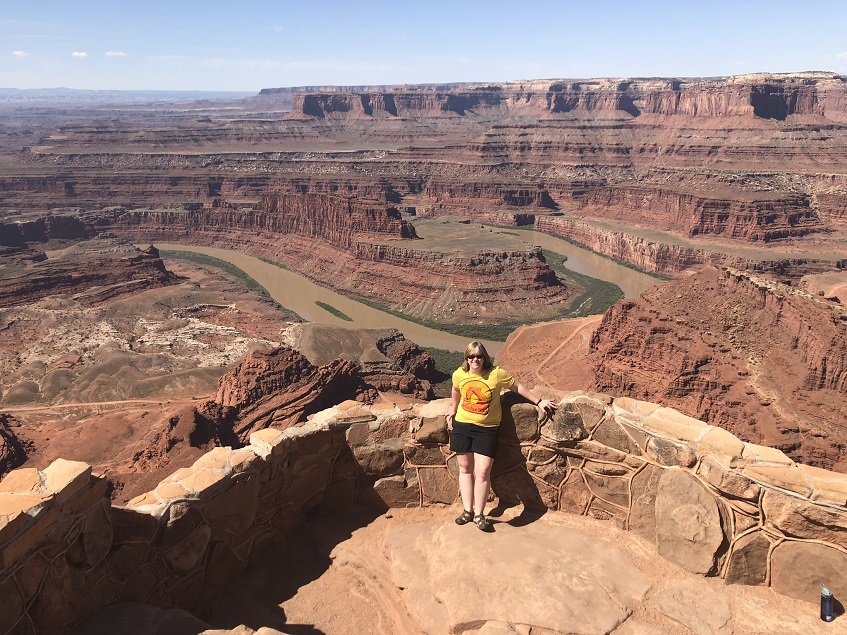
Our first stop inside the state park was the Overlook. We wanted to get a sense of the park and this was the perfect first stop.
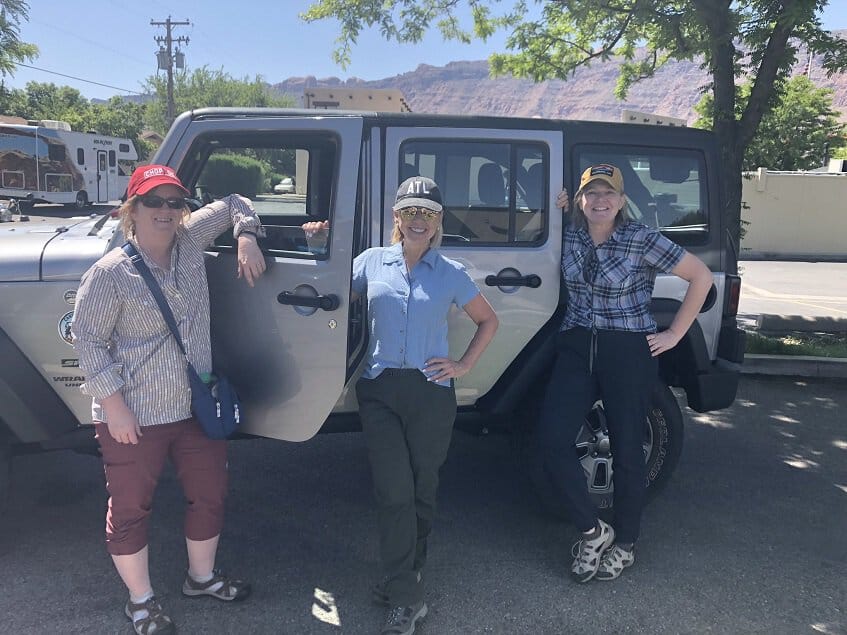
It was a 45-minute drive into Moab, and we had reservations for a jeep rental. We stopped at the visitor center on the way to officially check into our campsite.
Tip: Dead Horse is gorgeous, but we didn’t have time to explore this park during our stay. If time allows, add an extra day to explore. The park is great for hiking, bicycling, and mountain biking.
Exploring Canyonlands National Park
We had made reservations with Canyonlands Jeep Rentals. They provided us with suggestions on where to go, 4-wheeling instructions and general information about driving a jeep in the canyon. They also provided us with a Yeti cooler full of ice-cold water – exactly what we needed for a day in the dessert.
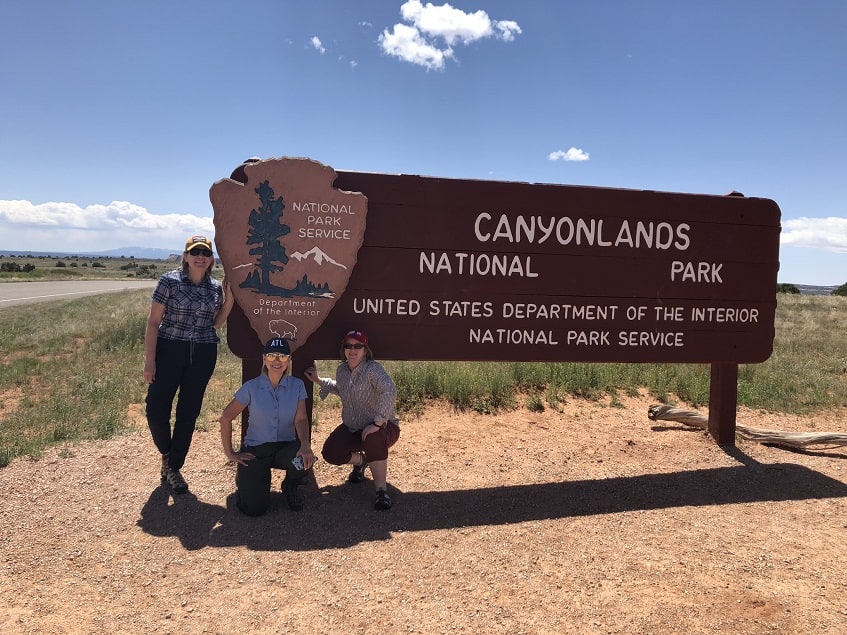
Our first stop in the park was for pictures at the National Park sign. From there, we headed to the visitor center to watch the video as we wanted to learn a little about the park too. We bought a few souvenirs and stamped our National Park passport book.
Four-wheeling
After the visitor center, we drove back toward the park entrance for the turn onto the Shafer Trail. We did have to share this narrow road with other drivers who were making their way out of the canyon.
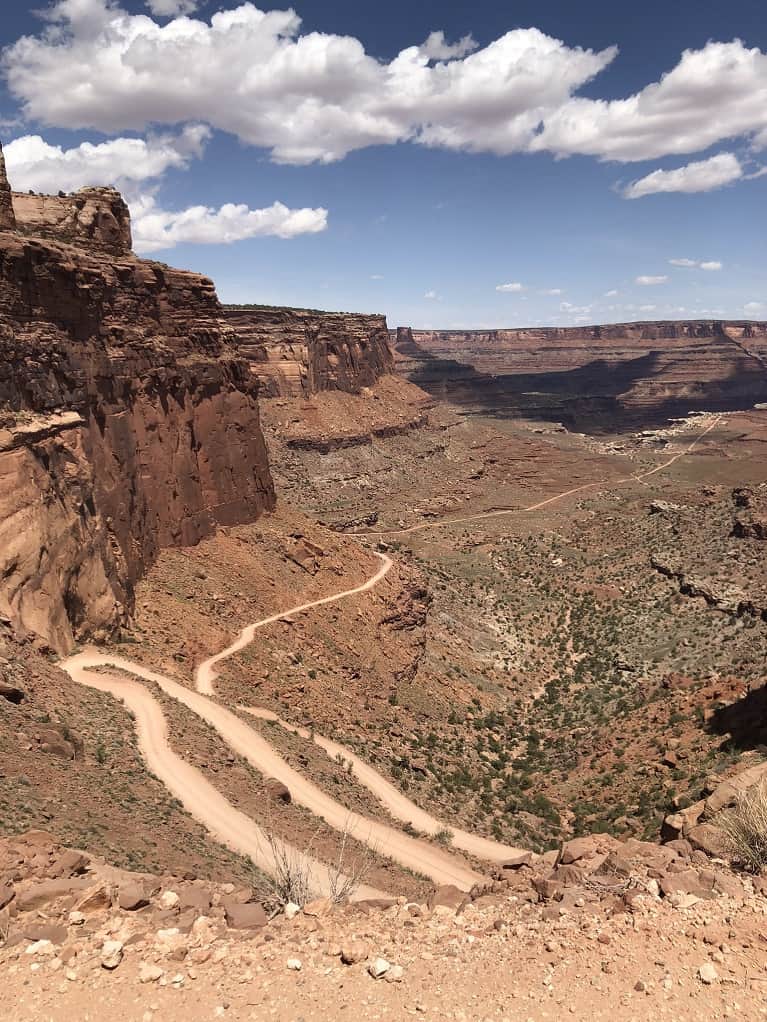
The Schafer Trail is considered easy by 4-wheeling standards since it is a well-maintained road. This trail is not for the timid driver or the one who is afraid of heights. We put the Jeep into 4L and gently made our way into the canyon!
The trail makes a descent of 1,500 in the first mile with steep, switchbacks along the narrow road. Every turn providing a different view and perspective of the canyon.
At mile 9, you gain a view of the canyon’s left rim with an awning – this is Dead Horse Point State Park. Directly south of the awning is Fossil Point, which was the filming spot for the final scene in Thelma & Louise.
At mile 12.5, you’ll see Potash Plant evaporation ponds. A few miles down the road, we gradually made our way down to the river.
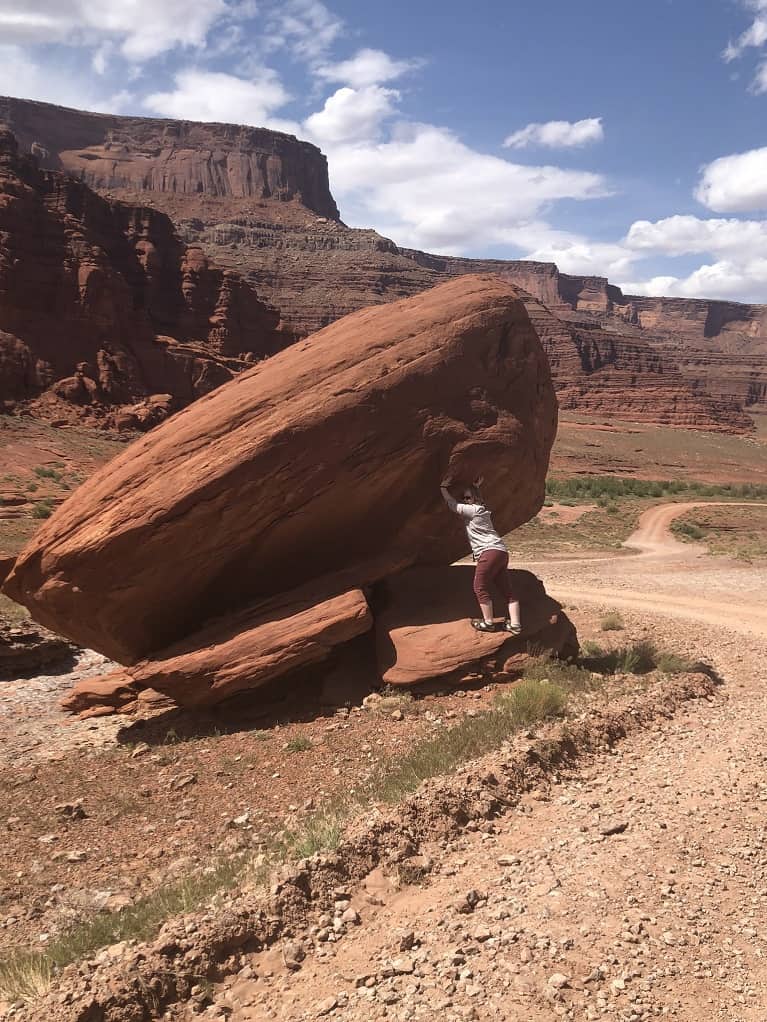
Along the way, we took our time stopping for short hikes, playing on the rocks and pretending we were Thelma & Louise.
The Schafer Trail was just over 18 miles and took us 5-6 hours with all our stops. We made our way back to Moab to turn in the Jeep, but not before stopping at the car wash for a quick rinse before turning it back into Canyonlands Jeep Rentals.

Tip: You aren’t allowed to have alcoholic beverages in the National Park, but we packed some for a nice cold one after we exited the park. We also packed a lunch and snacks since we were gone all day.
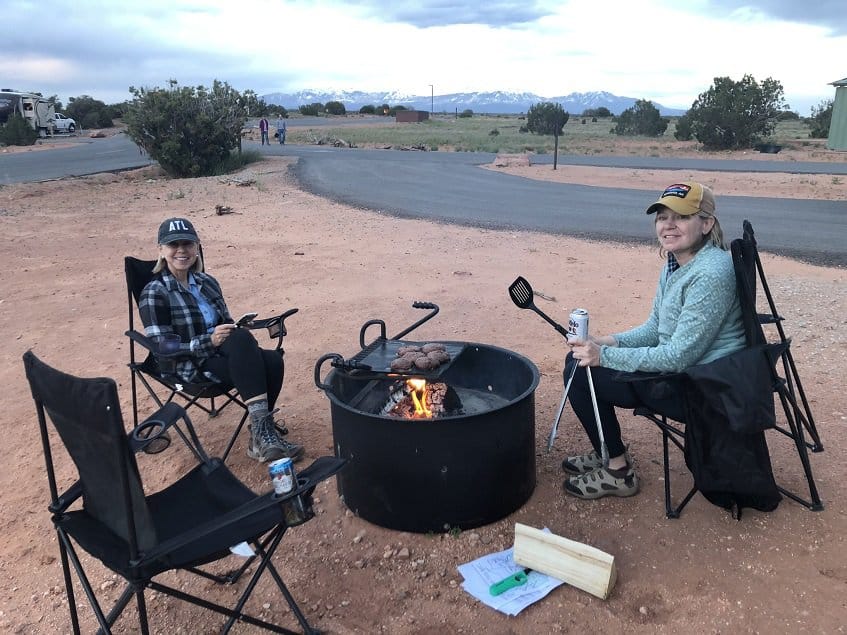
Campsite time
The campsites at Dead Horse are nice – both regular campsites and the yurts.
Campsites included grills and covered picnic tables along with hookups for our RV (check to see if all campsites have hookups). Yurts had surrounding decks with grills and picnic tables. They are also heated and cooled for varying weather.
Tip: While we missed it, do your best to catch the sunset at Dead Horse Point )verlook. We heard stories about the beautiful sunsets and one thing we wished to have seen during our time there.
Also, not all sites have RV hookups. If you are driving a RV, be sure to check the Dead Horse Point State Park campground website for more information.
Day 3 – Dead Horse Point State Park / Arches National Park
The next morning, we followed the same routine as the previous morning. Woke up to sunrise, coffee in the cool temperatures before heading out. The only difference is this morning, we were leaving Dead Horse for the campground at Arches National Park.
Leaving Dead Horse Point State Park
Since we were not coming back to Dead Horse, we made a quick stop at the Overlook one more time before heading out.
Exploring Arches National Park
Arriving at Arches, we made our first stop the visitor center. We wanted to see if it was possible to get tickets for the ranger-led hike to Fiery Furnace, before laying out our plan for the day.
Upon arriving at the visitor center, we were disappointed to see there were no passes available for the Fiery Furnace hike.
We decided to do the driving tour of Arches with saving Delicate Arch hike for the following day based on the Ranger’s recommendation. We were off to explore Arches!
Tip: If you know Fiery Furnace is of interest to you, book your hike when you make the other travel arrangements.
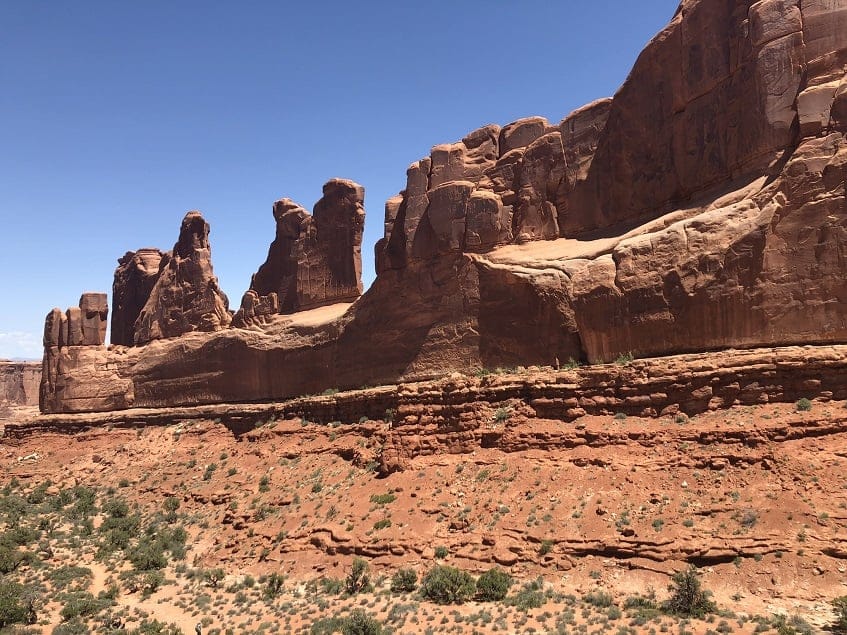
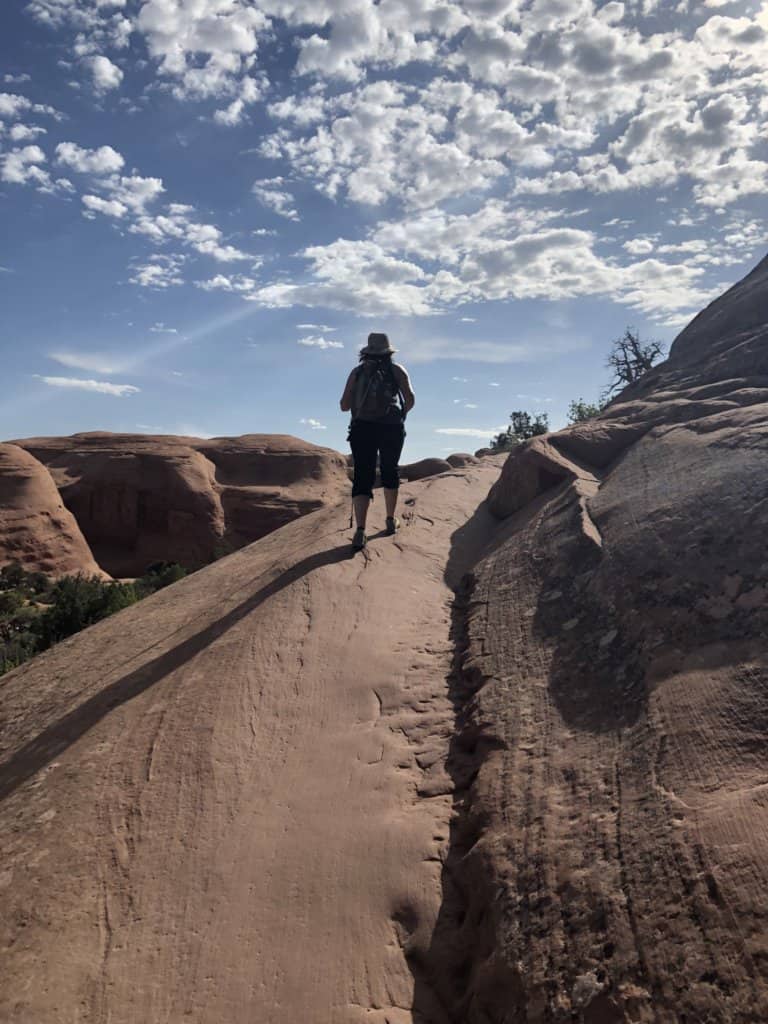
Park Avenue
This was our first stop after leaving the Visitor Center. Park Avenue is a can’t miss stop. The trail to Park Avenue starts off paved and then turns into a dirt trail to walk through Park Avenue. The paved path is easy, but if you hit the dirt path it changes to a moderate hike. The moderate section is a 1.0-mile round trip hike.
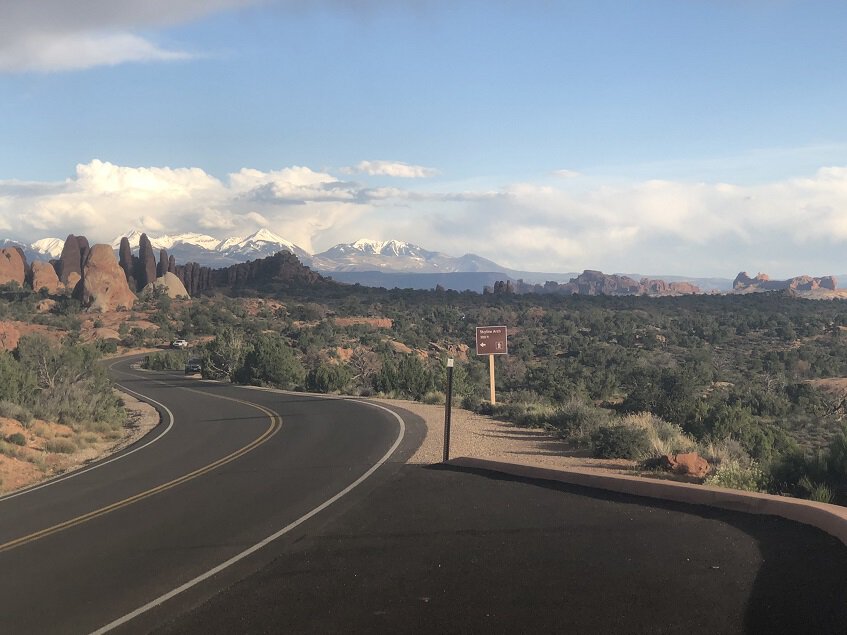
La Sal Mountains viewpoint
Seeing the red rock of Arches against the backdrop off the snow-capped mountains was beautiful.
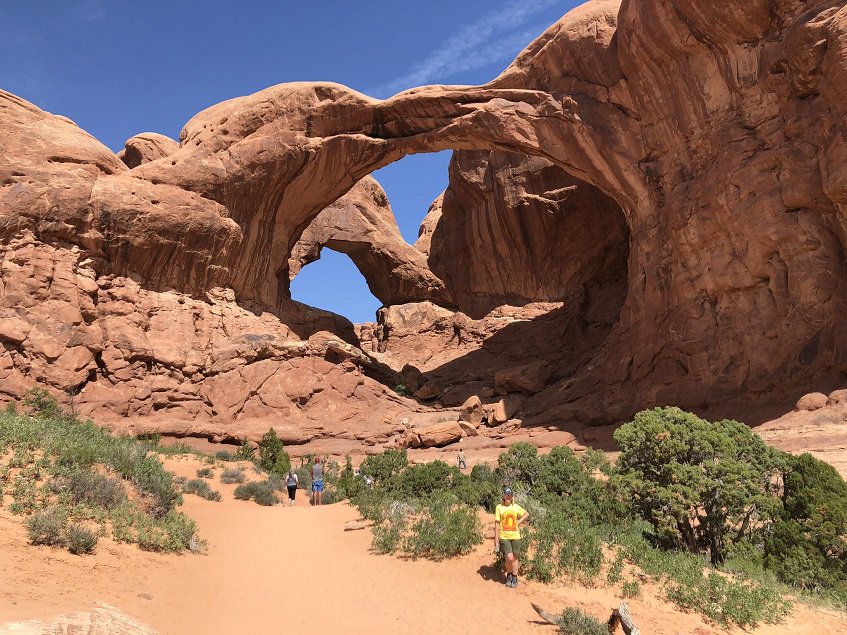
Balanced Rock
We continued making our way north with a few pull-offs for pictures only. The path to Balanced Rock is a mostly paved, easy, 0.3-mile walk. You can get off path and walk around the rock if desired.
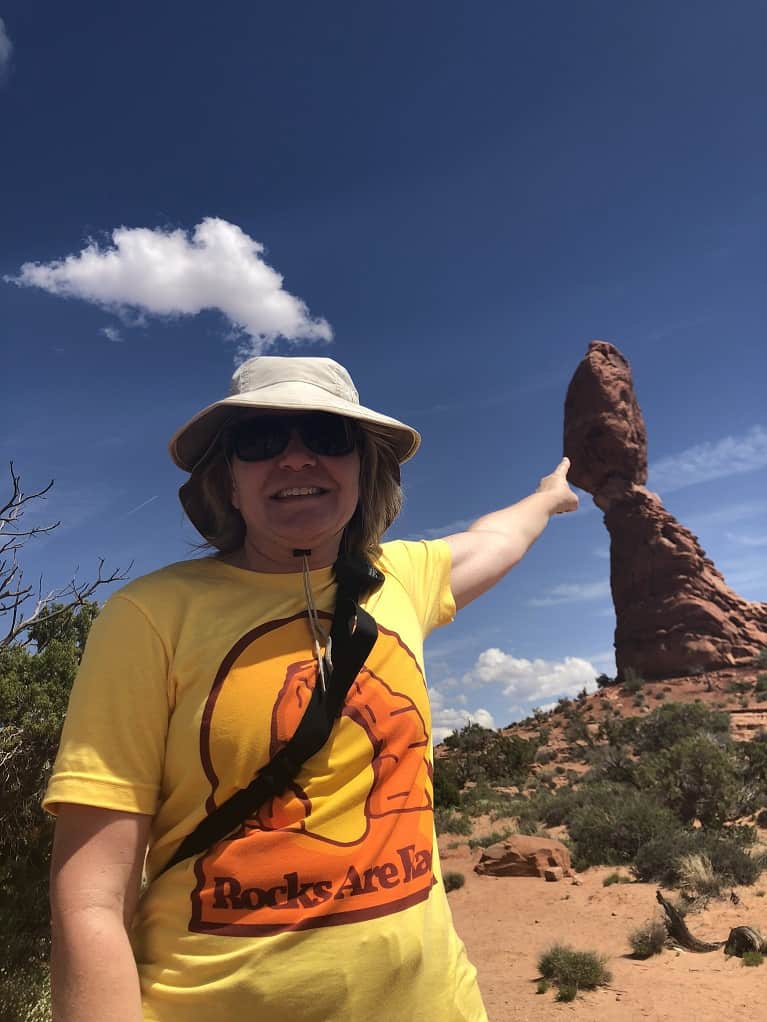
Be creative and take pictures as if you are holding up the rock.
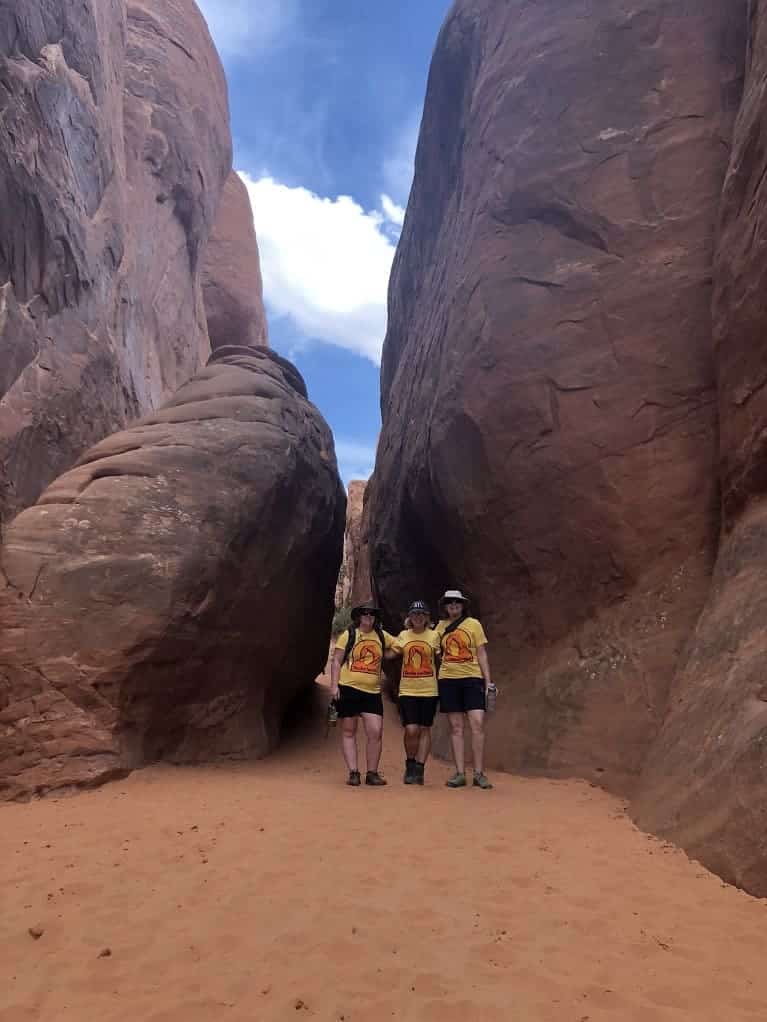
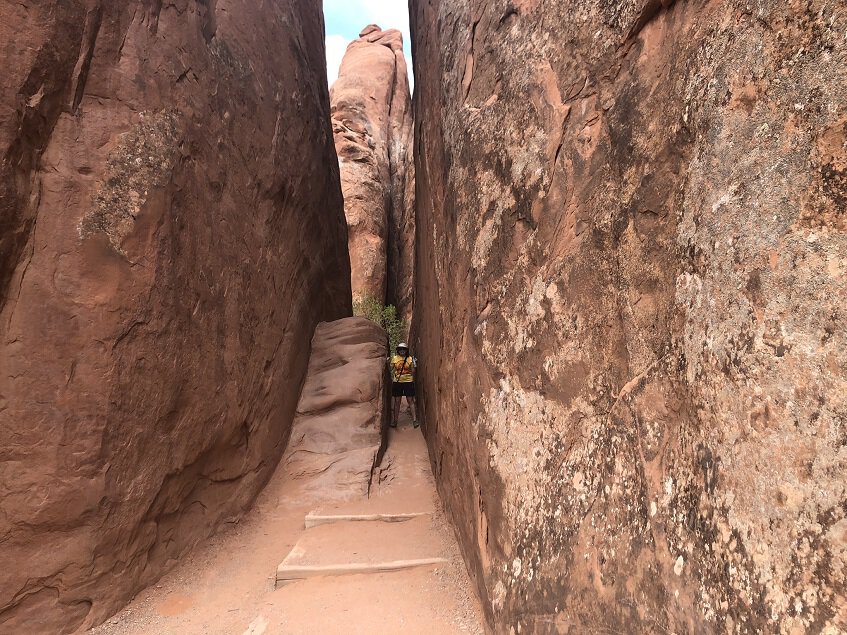
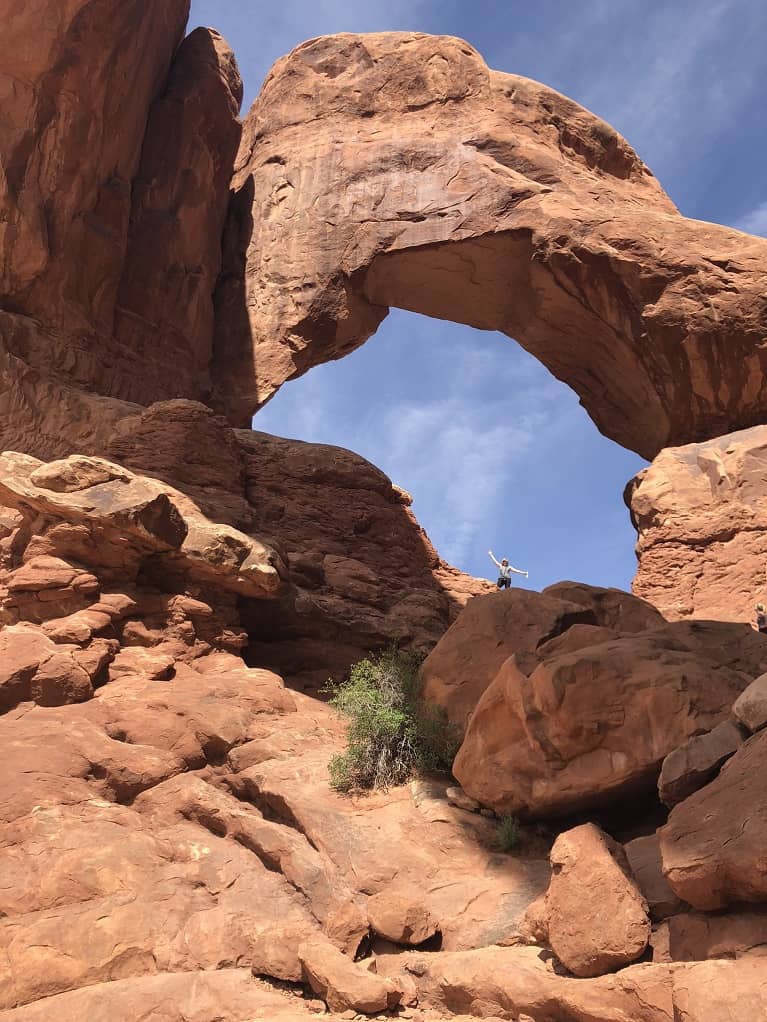
Sand Dune Arch
Our next big stop was Sand Dune Arch. The hike to Sand Dune Arch is an easy 0.3 miles round trip. There are some cool, short slot canyon just before the arch which are nice for picture taking. While an easy hike, this is one of my favorite Arches National Park hikes.
Tip: Broken Arch can be accessed from the same parking area. The hike is slightly longer to Broken Arch at 1.3 miles round trip.
The clouds were starting to roll in, so we made our way to our campsite in the Devil’s Garden campground.
Devil’s Garden Campground
We wanted to make sunset at The Windows, so we setup camp, made a quick dinner and drove back south for The Windows.
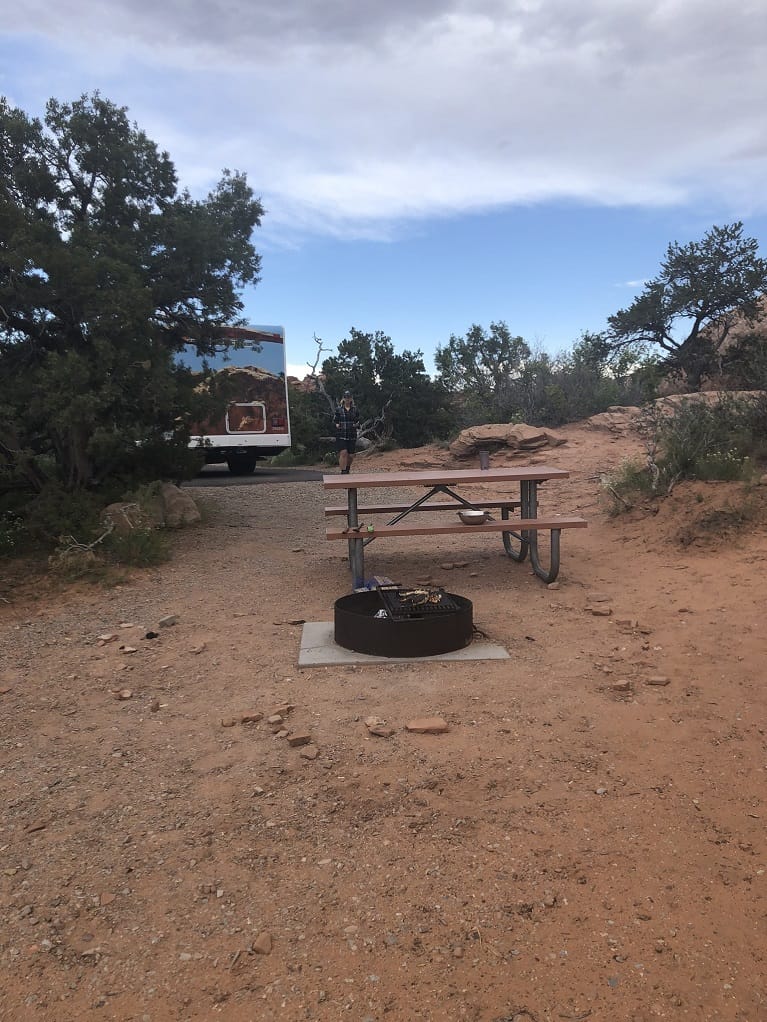
Tip: The campgrounds here have no amenities. Be sure to bring all your needed supplies. The campground host does ride through selling firewood for exact change of $7. The bathrooms do not have showers, but they do have a sink for dish washing. There are also no hookups for RVs and no generator running after 8pm.
Sunset at The Windows
While the clouds didn’t cooperate, we stayed until sunset while playing a little on the rocks.
Tip: After driving back south for the sunset at The Windows, we realized the rocks look different as the light changes throughout the day. If time allows, drive through the park at different times to see the change.
Only have 1 day at Arches National Park? Here’s a nice itinerary for one day at Arches National Park!
Day 4 – Delicate Arch hike / Goblin Valley State Park
After speaking with the ranger, the day before, we decided to start our day with a hike to Delicate Arch. While we didn’t make sunrise, we did get up for an early start.
Delicate Arch hike
We parked the RV at the trail head located at Wolfe Ranch. Since the Ranger recommended hiking early, we decided to follow all their recommendations with packing 2 quarts of water/Gatorade each. We also had options for snacks including trail mix, energy chews, and a few other varieties of snacks.
Tip: If the parking area is full, you can park in the Delicate Arch Viewpoint parking area, but it adds 1-mile to your hike from here.
The 3-mile round-trip starts with a walk through the old John Wesley Wolfe homestead from the early 1900’s. The trail is flat here for approximately a half-mile.
Just before you start up the first set of switchbacks, there is a side trail to the left where you can view some Ute Indian petroglyphs.
Be ready as the switchbacks start to elevate as you hike along the Delicate Arch trail. This first section of switchbacks is one of the steeper sections of the trail. After the switchbacks, the trail becomes more rolling. The last big climb is up a big slick rock slope which has not shade – another reason for going early or possibly going around sunset.
Once you are up the large rock slope, you will walk along a flat section with some areas of sand.
Your last climb goes up a short set of steps and then a flat walk along a narrow ledge with a drop off to the left side. Take your time and be considerate of others coming back down the trail.
If you aren’t afraid of heights, there is a small window high on the right side of the ledge, where you can climb up for a nice solitary view of Delicate Arch.

Finishing the short walk along the rock ledge, you suddenly come around the wall for one of the most spectacular views at Arches National Park.Tip: If you are afraid of heights, you may have trouble along the rock ledge and walking down to the Arch.
Read this article on tips for hiking Delicate Arch!
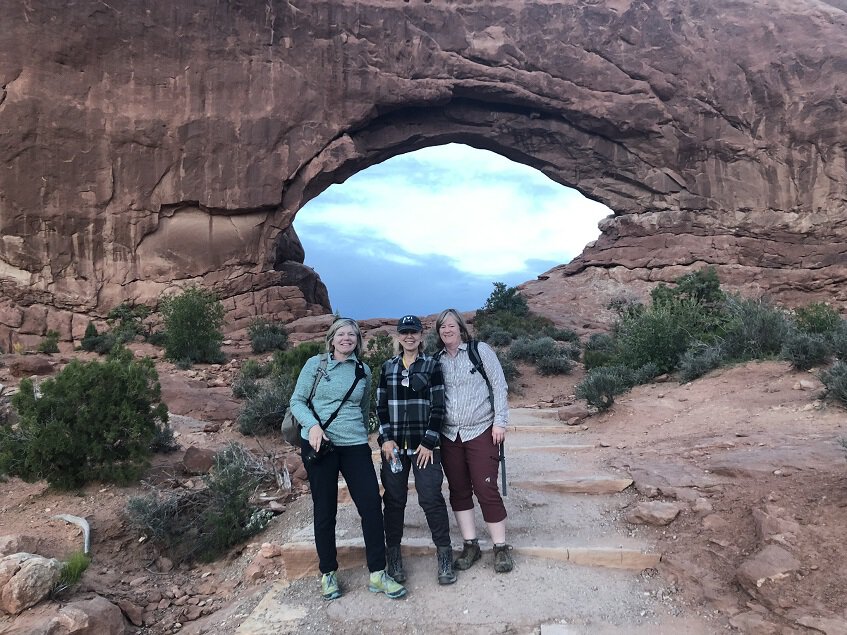
The Windows
While we had visited The Windows the night before, we wanted to see the other side. We made the short hike and did a little climbing on the rocks before we headed out of Arches.
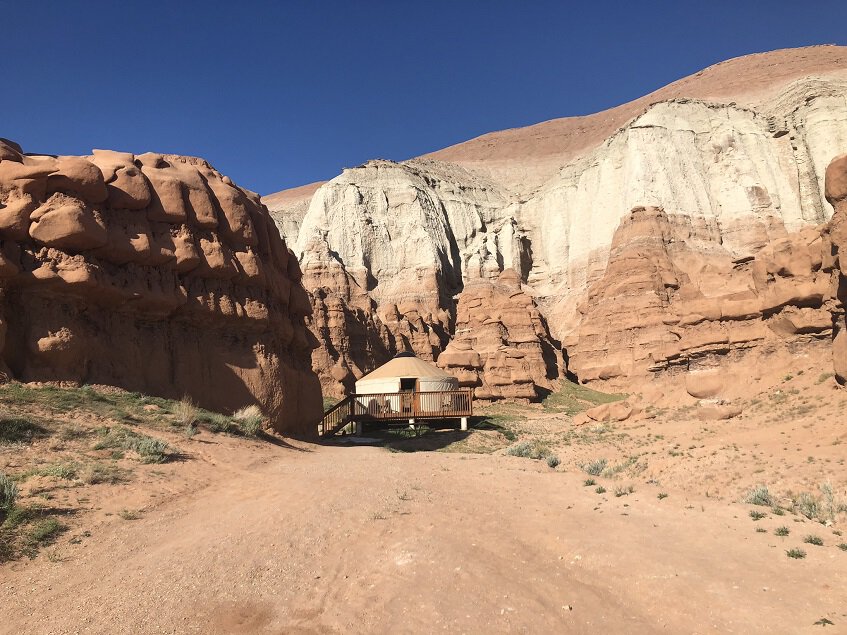
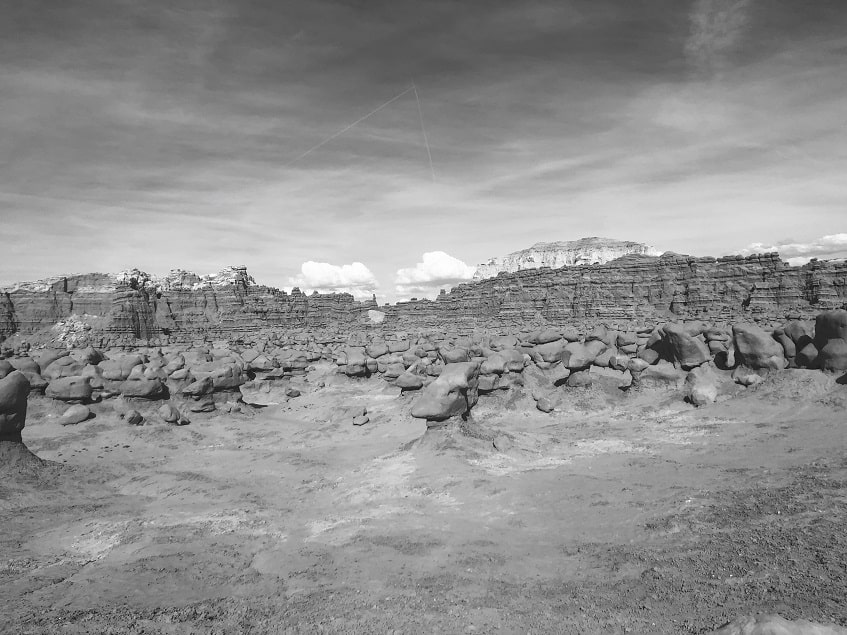
Goblin Valley State Park
We got out of Moab around 2pm in the afternoon for the 2-hour drive to Goblin Valley State Park.
Checking in at the ranger station, we made our way to yurt #1. Yurt #1 sits off the road tucked into the rocks. The amenities included a fire pit, grill, and chairs for hanging out on the deck.
Knowing we didn’t have much time, we decided to explore the park a little. (Get more details on the area we went to).
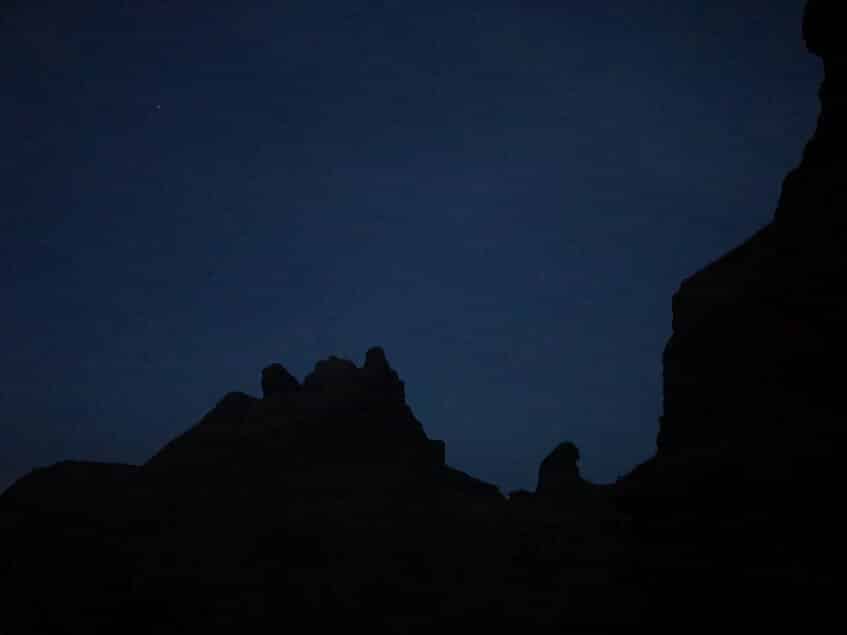
We also learned this park is the 2nd darkest spot on earth! The highest certified rating for darkness is 22, with Goblin Valley’s rating at 21.7!
After doing some climbing around on the goblins, we headed back to our yurt for leftovers on the grill and homemade smores!
Tip: This is a very desolate area of Utah. Do not rely on phone GPS for directions or an emergency.
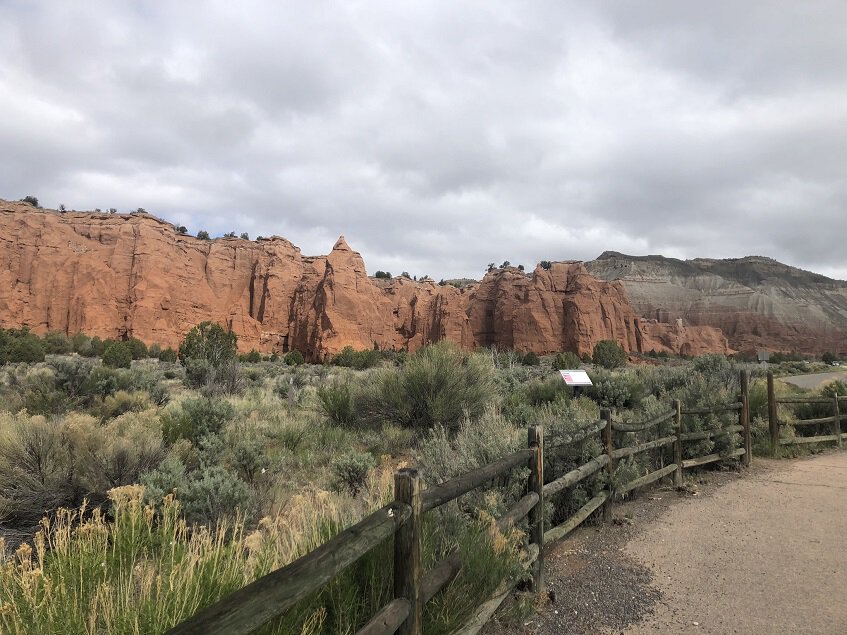
Day 5 – Goblin Valley State Park / Capitol Reef National Park / Scenic Route 12 / Kodachrome Basin State Park
Knowing we had a full day ahead of us, we packed and left early for Capitol Reef National Park. Later in the day, we would be driving Scenic Route 12 from Capitol Reef to Kodachrome State Park. The ranger at Goblin Valley highly recommended we NOT make this drive in the dark as the road is very winding along high peaks with few guardrails.
But we did take time to enjoy the sunrise at Goblin Valley, which filled the sky with varying hues of blues and oranges as we enjoyed our morning coffee.
Mesa Farm Market
On the way to Capitol Reef, we had read before we left Atlanta about a small goat farm where you could enjoy freshly made goat cheese and other goodies.
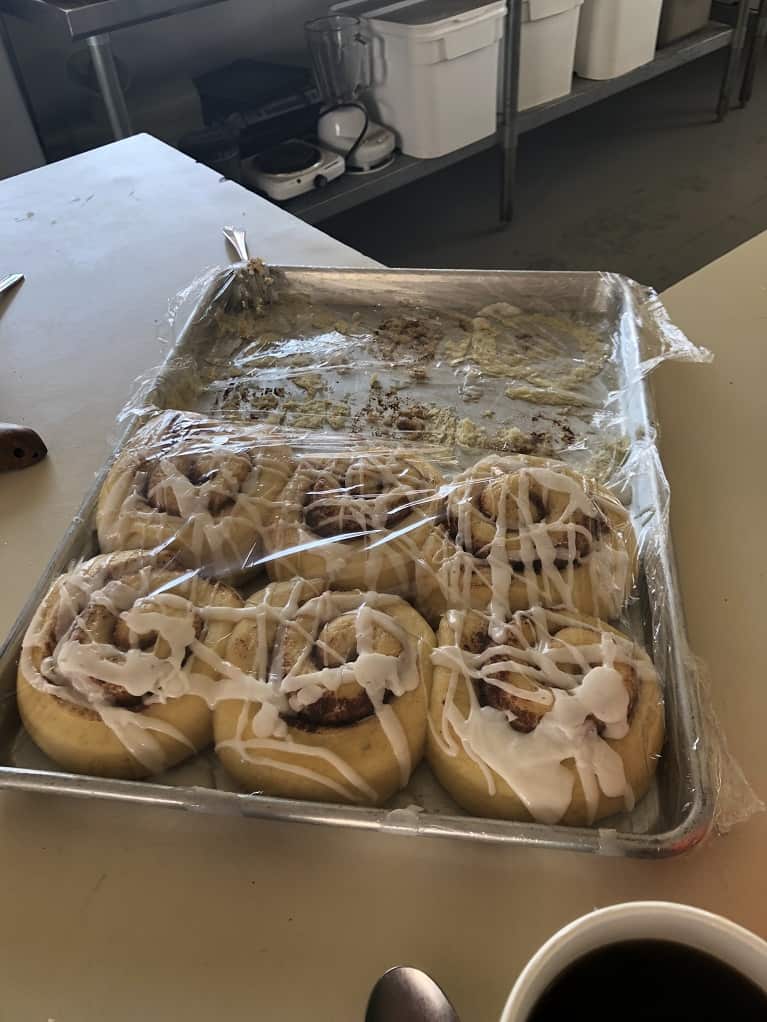
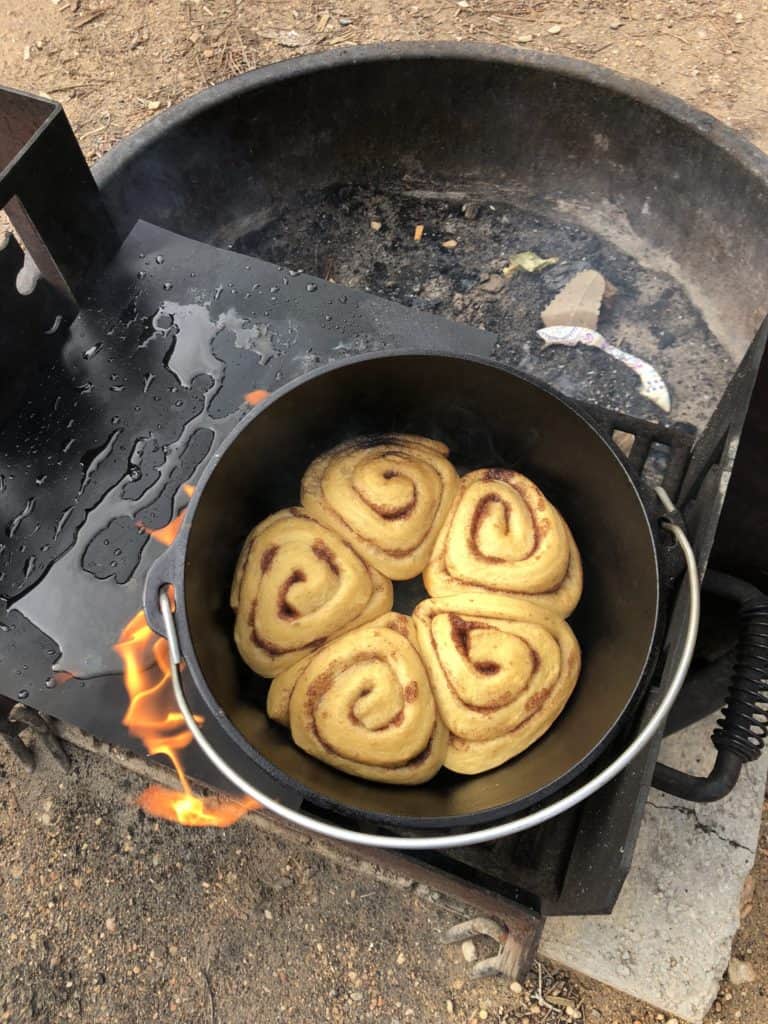
While we did pass it the first time, we backtracked to stop at Mesa Farm Market. They have 41 goats on the farm where they make their own goat cheese, yogurt and breads. We sat for a little while chatting with Randy, the owner, while we devoured our cinnamon roll and freshly brewed coffee. We bought some goat cheese, bread and yogurt to enjoy later. We all agreed we should have purchased more after we realized how delicious all the goodies were later.
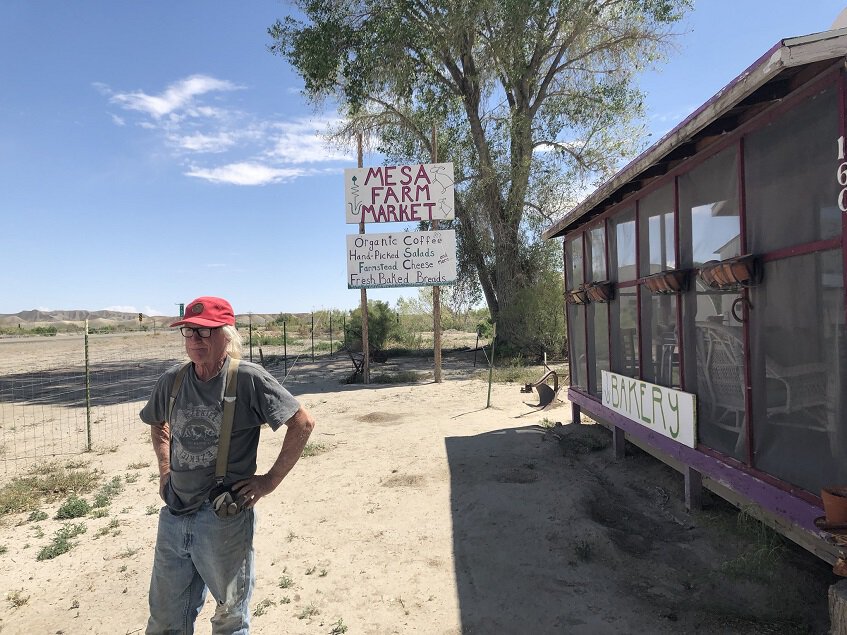
We didn’t depart until taking a few pictures with Randy and giving love to the goats.
Exploring Capitol Reef National Park
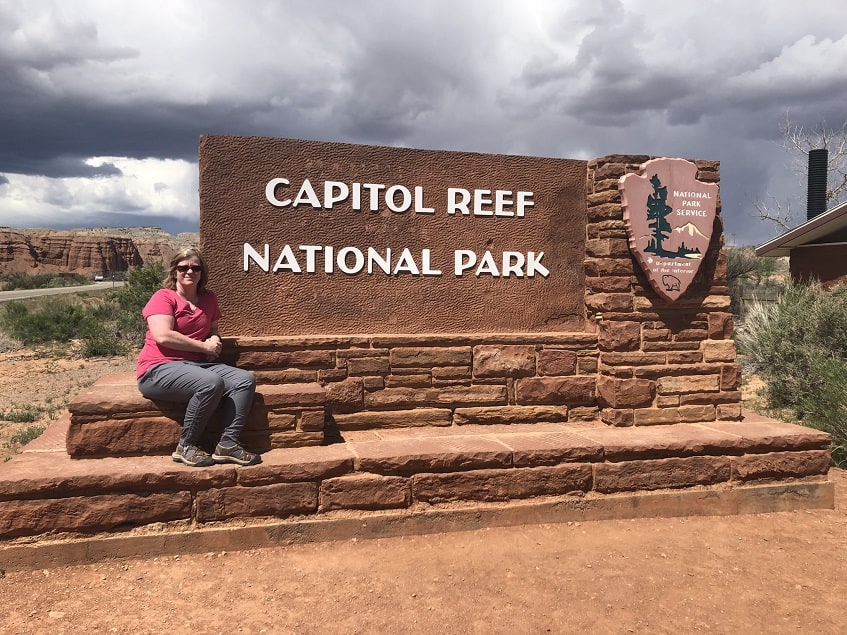
The biggest thing we learned during our trip through Capitol Reef is this area was originally settled as a Mormon community.
We started our whirl wind trip with a stop to look at the Fremont River.
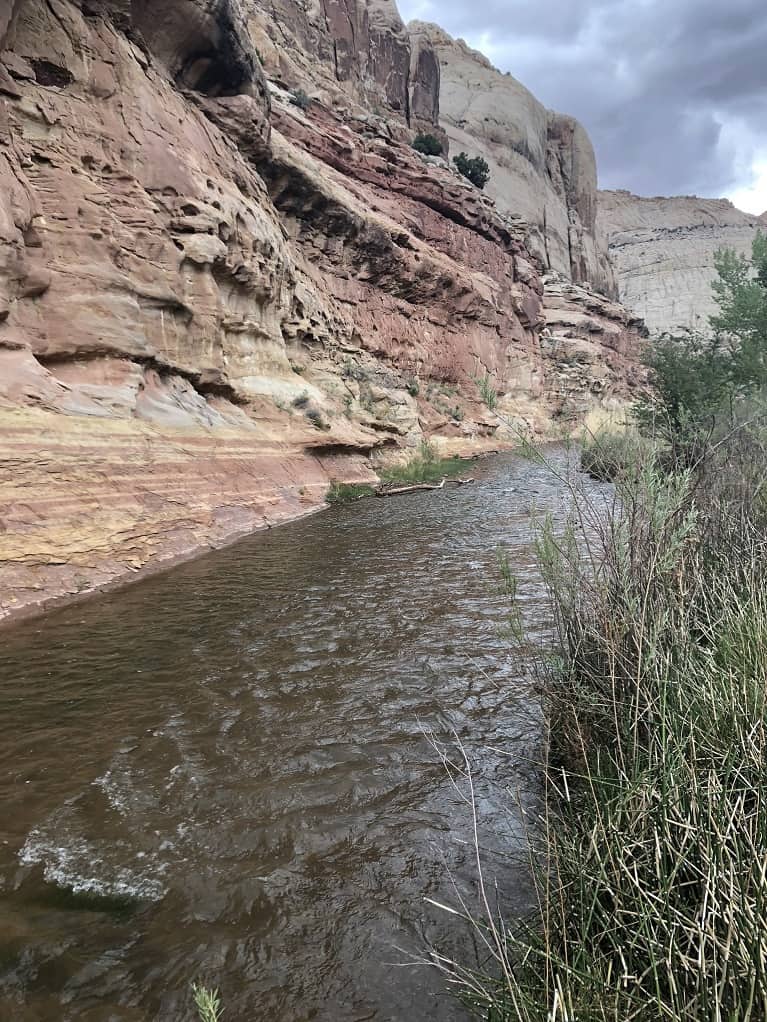
Hickman Bridge
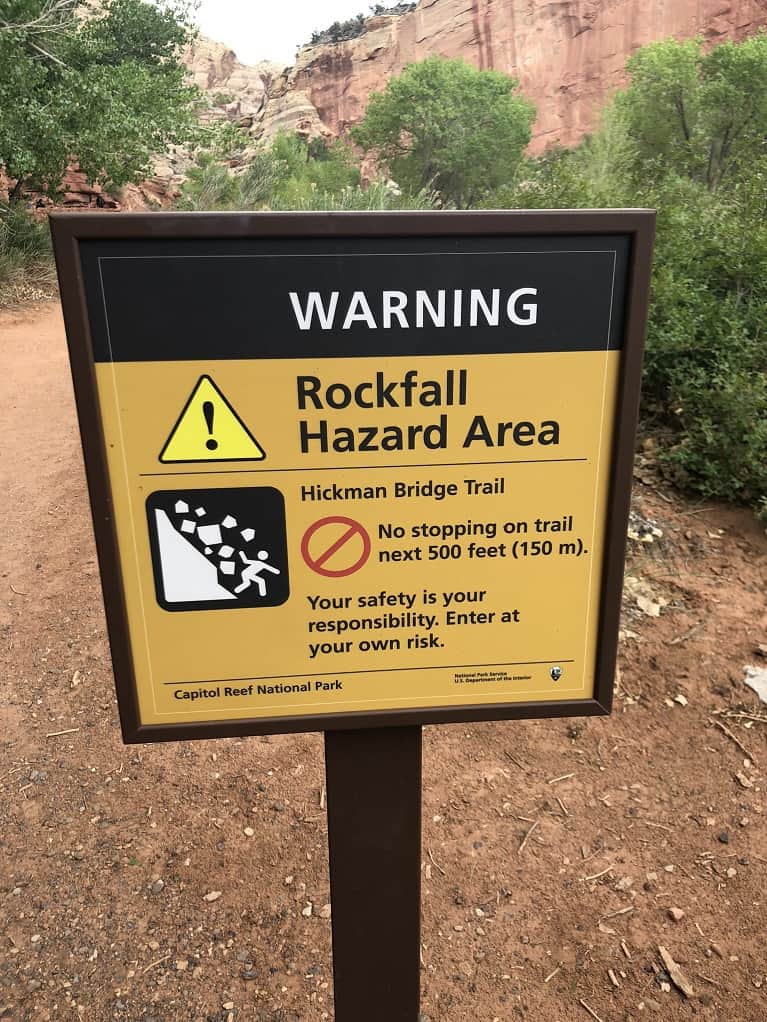
Next stop was the hike to Hickman Bridge. We started the hike along the same river, <river name>. Climbing up and down along the rocks, we had views into the canyon from above.
Arriving at the bridge, it was like arches we saw while visiting Arches National Park, but the rocks looked quick different. Everywhere we turned there was a beautiful view for us to remember with a photograph.
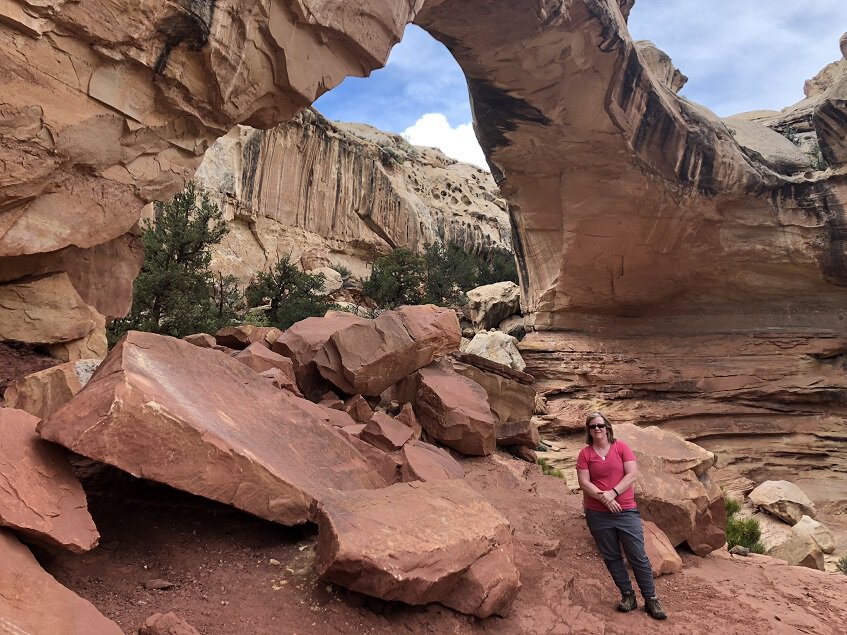
We were able to walk around the bridge to gain different vantage points before starting our way back.
Riding through Capitol Reef
Our next stop was the visitor center to watch the video, buy some souvenirs and figure out what else we should see while in the park.
We took the scenic road all the way to Capitol Gorge. Since we were in a RV, we were not able to make it to the gorge. But we did park in the small parking lot to walk around a little.
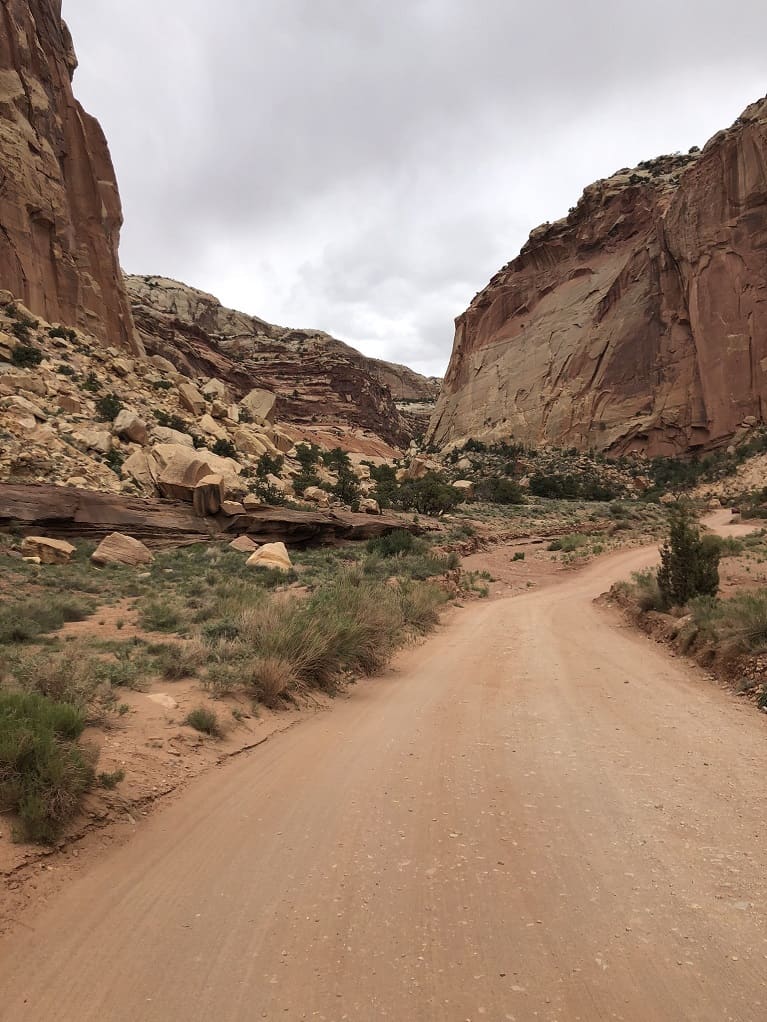
Our last stop before heading out of the park was the Fruita historic area with there was a fruit tree grove. I really wanted to climb over and pick one, but I refrained.
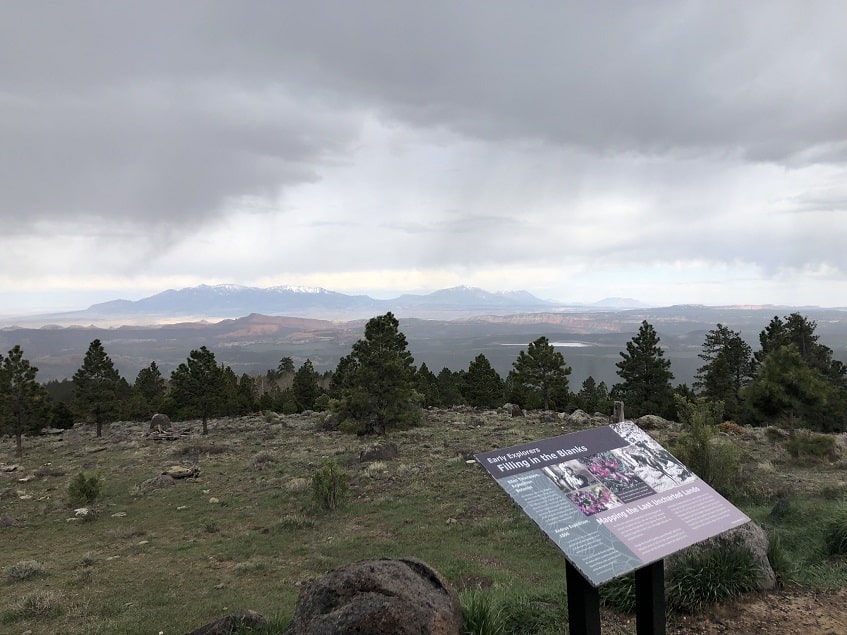
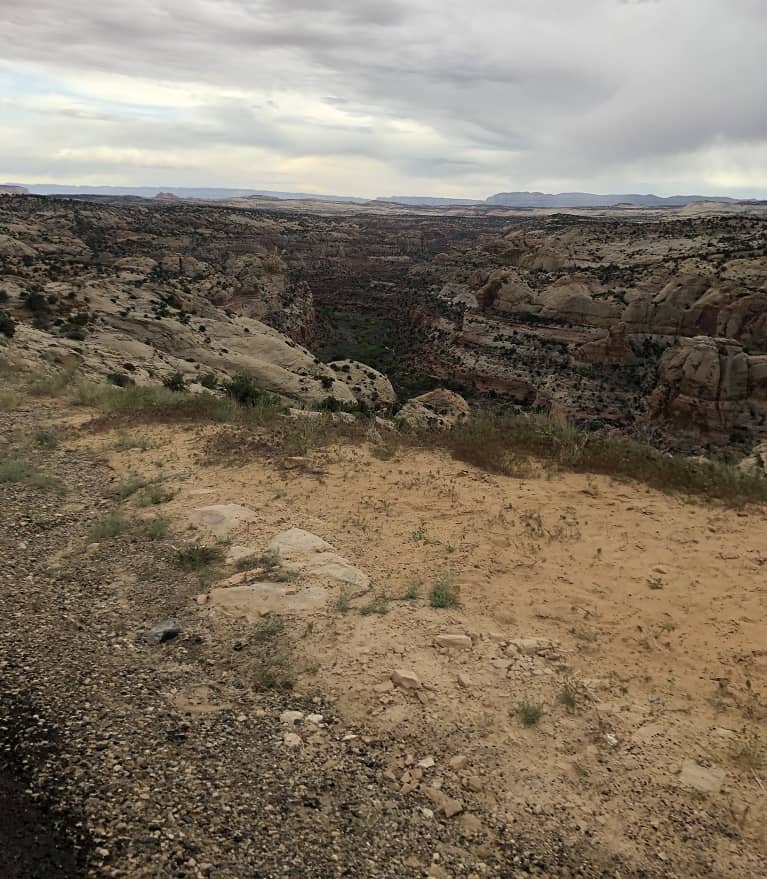
Scenic Route 12
The ranger from Goblin Valley wasn’t kidding when he said the roads were winding with steep drop offs and few guard rails! We reached the highest peak of 9,000 feet before slowly making our way back down. It was starting to get rather chilly and even saw some snowflakes when we stopped at one of the overlooks.
This drive took us through Escalante, which appeared to be one of many very cute towns along the way. If we had enough time, we would have stopped to walk around.
Kodachrome Basin State Park
By the time we arrived at Kodachrome, it was dark and raining. We made dinner in the RV and settled in for some good RV time.
Day 6 – Kodachrome Basin State Park / Bryce Canyon National Park
Leaving Kodachrome Basin State Park
While it was a crisp morning, the rain had moved out and the sun was shining. We could hear the babbling brook beside our campsite and knew it was going to be a great day. However, rumblings around camp indicate the rain hasn’t left and there is even the possibility of snow!
Our day started with breakfast, but shortly after we took a stroll through the campground. We rumor before arriving the showers at Kodachrome were not to be missed. We stepped inside the bathroom and the showers were like something from a high-end spa! Immediately, we ran back to our RV to grab our shower supplies!
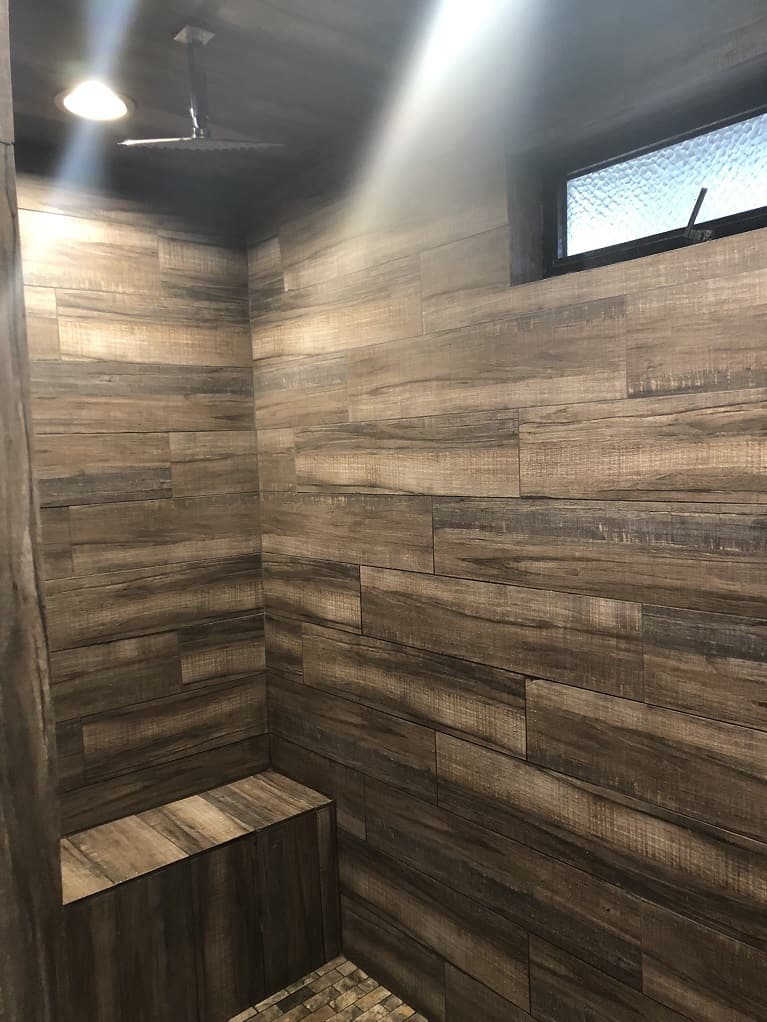
The showers were the best I’ve ever experienced at any campground – they are nicer than my own house with the rain shower heads!
Unfortunately, we didn’t have time to explore anything else around the park. It looks beautiful and we regretted not having more time here. But we needed to arrive at Bryce Canyon early knowing the campsites are not reservable and they can fill up early.

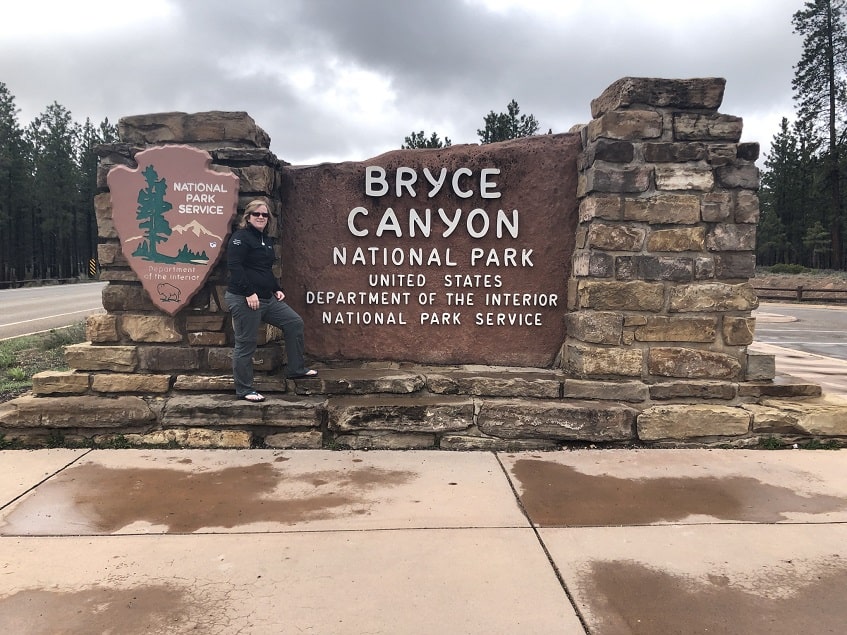
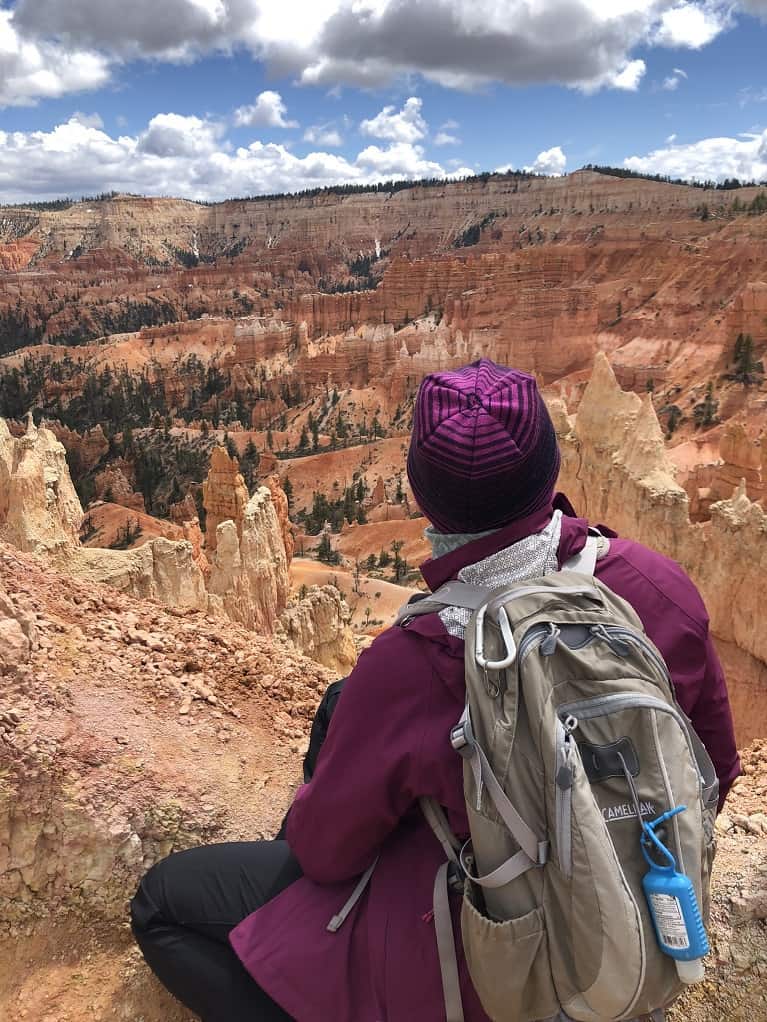
Bryce Canyon National Park
The drive from Kodachrome to Bryce Canyon is just over 30 minutes. Since we had gotten an early start, we arrived at Bryce Canyon without feeling we had to rush.
We stopped at the National Park sign for our obligatory picture. By this time, it was already cloudy, and we were a little worried about the weather. It was also cold! Did we bring enough clothes for it to be this cold?
Campsite
Our first stop was the campground since it was located just inside the park entrance. We drove through a couple times and was able to have our pick of the best spot available. Next stop as usual was the Visitor Center.
We learned it was best to either walk around the park (as much as possible) or take the park shuttle. Our RV wasn’t allowed on the main scenic road until the evening. We watched the movie, bought a few extra items for cold weather which we didn’t bring with us, and stamped our passports.
Getting back to the campsite, we decided to make lunch since it was approaching lunch time and we knew it would be busy once we started enjoying the park. On this cold, blustery day at Bryce Canyon, we made hot dogs and chili – hit the spot!
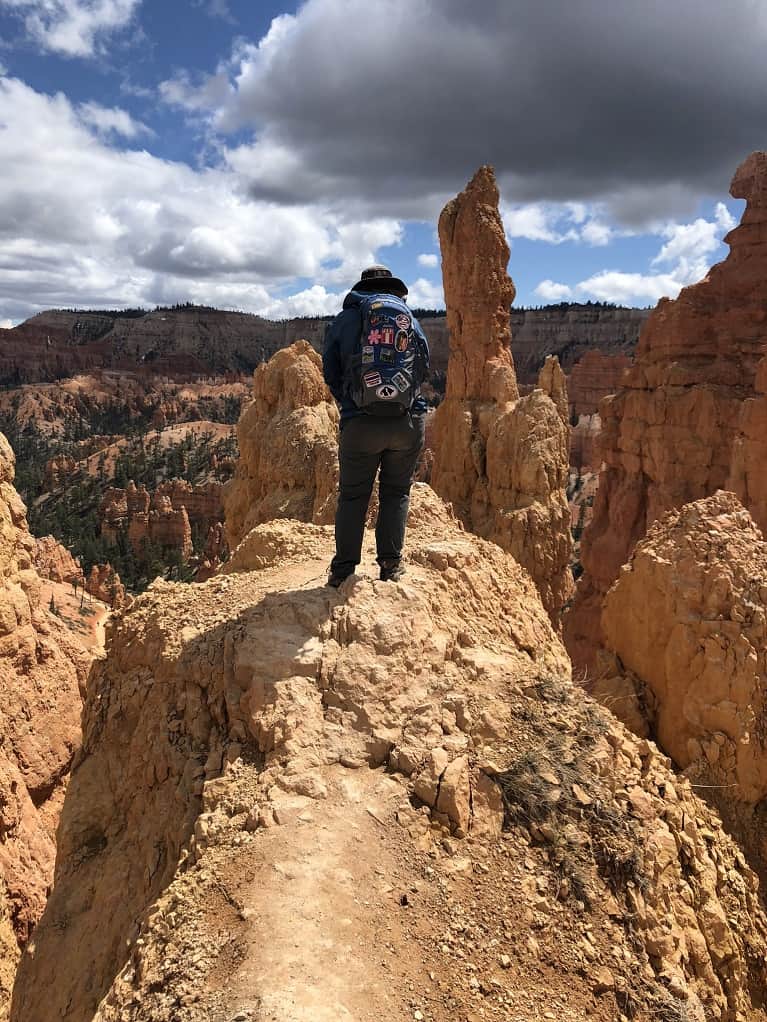
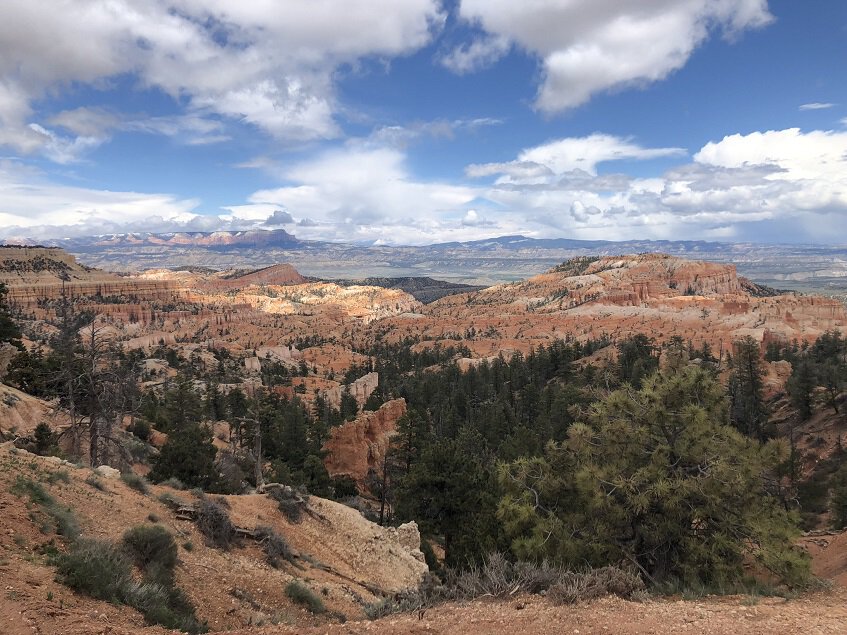
Queen’s Garden trail
We started our exploration by taking the paved path to Queen’s Garden Trail from the campground.
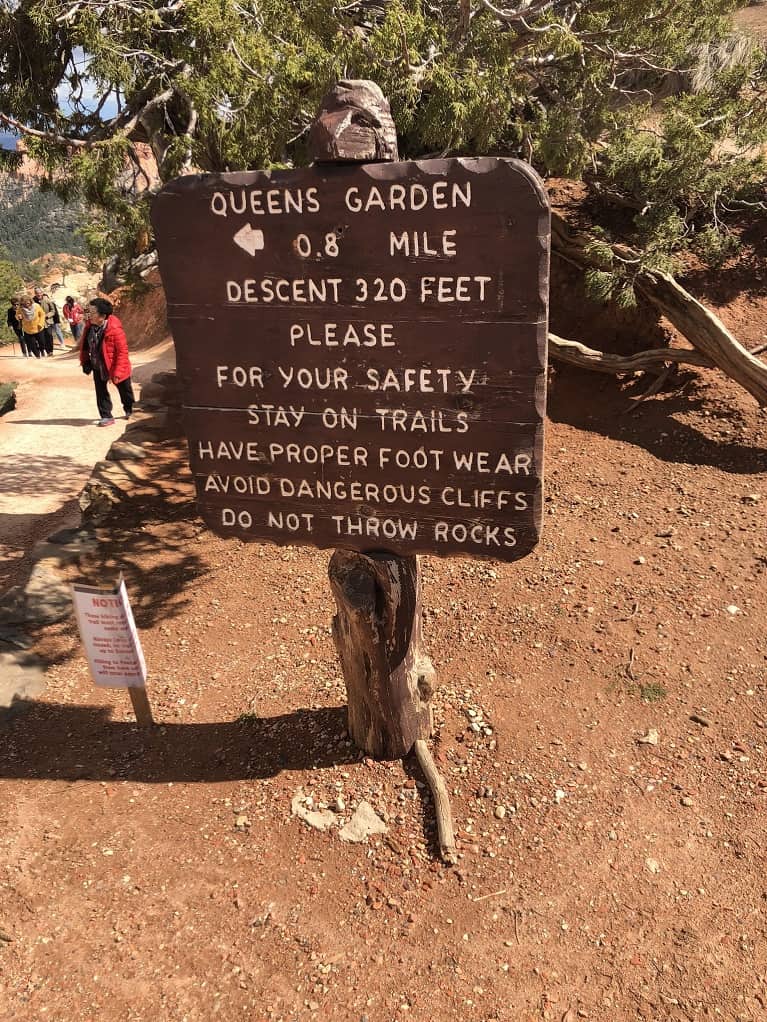
The trail to Queen’s Garden is probably one of the more popular Bryce Canyon trails. It is the least difficult of all the Bryce Canyon hikes which takes you into the canyon. The trail is 1.8-miles round-trip and should take 1-2 hours depending on your physical ability.
We started down the path and one in our group decided it was too steep for her. She was gracious enough to tell us to go on.
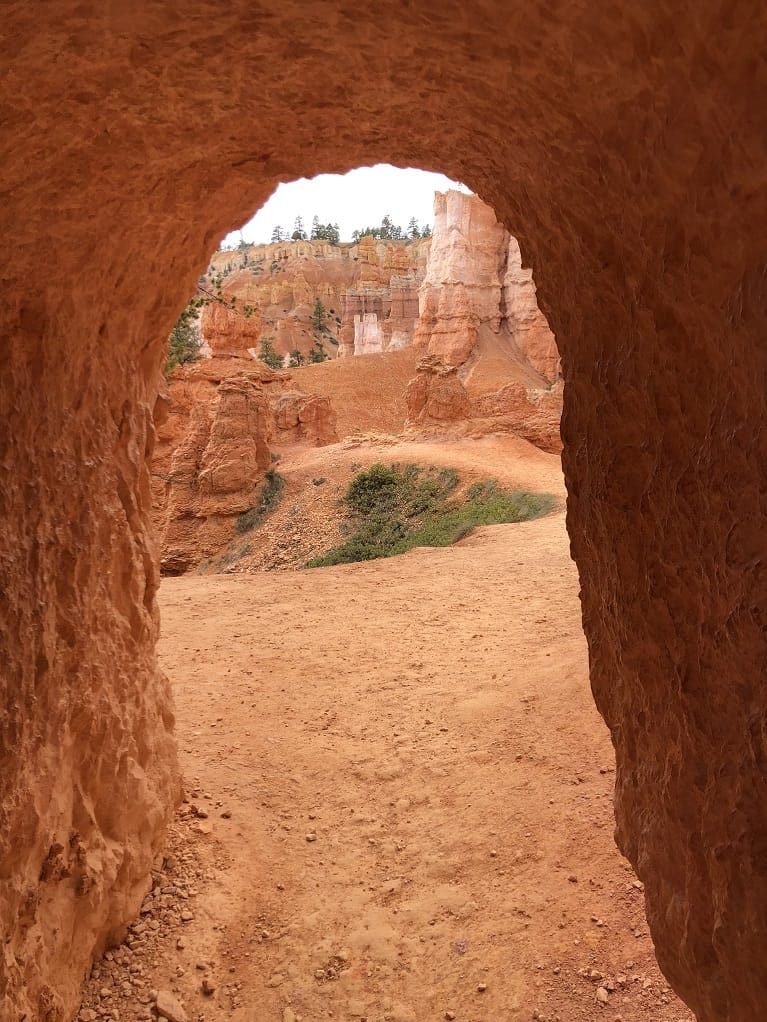
The hike down to Queen’s Garden was easy (it was straight down) and we stopped for some interesting pictures along the way. We made it to what we thought was Queen’s Garden only to realize we were not there yet! The trail meandered down going through some small, short tunnels which were a great place to take pictures.
We made it to Queen’s Garden and were like, oh yeah, we see it! We didn’t stay long because we were not sure how long it would take us to get out of the canyon. I left first knowing I’m the slower of the 2 of us.
While getting out of the canyon was a little strenuous, it wasn’t as difficult as I thought it would be. We stopped a few times for more pictures, get a drink of water, and to catch our breath.
We were back up on top in no time!
Tip: If you are afraid of heights, this trail may not be for you! This hike is also a great place for Black and White photos!
Scenic Drive
After the hike, it was allowed for us to drive the RV through the park and use the parking lots. We decided to drive to the most western point and make our way back to the campground.
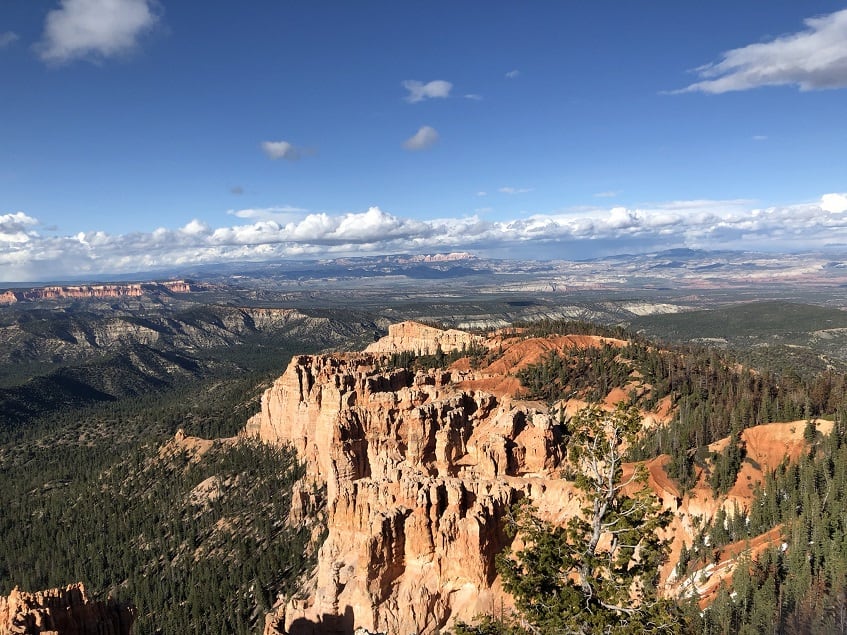
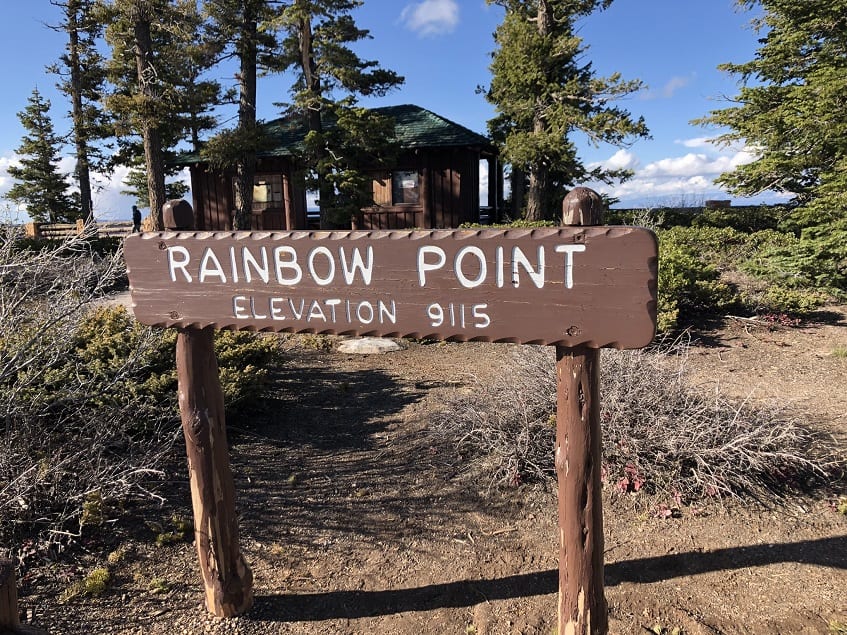
We made our way out to Yovimpa Point (mile marker 18) to start our journey. We make some short walks around the area for different viewpoints of the canyon. The rangers were also conducting small, controlled fires in this area so it was a little smoky.
After leaving the area, we make these stops along the scenic route was we made our way to Sunset Point for the sunset.
- Ponderosa Canyon (between mile marker 14-15)
- Agua Canyon (between mile marker 13-14)
- Natural Bridge (between mile marker 12-13)
- Inspiration Point (between mile marker 2-3)

While Sunset Point can be enjoyed at any time during the day, it was a perfect end to our first day at Bryce Canyon.
Only have 1 day at Bryce Canyon National Park? Here’s a nice itinerary for one day at Bryce Canyon National Park!
Day 7 – Bryce Canyon / Zion National Park
We woke up this morning to sub-32-degree temps and realizing we could see our breath. Visiting Utah in May, it was a given we could experience cold weather, but I don’t think any of us were prepared for this cold.
We managed to figure out how to turn on the heat in the RV and it quickly warmed enough for us to cook breakfast and get ourselves ready for the day.
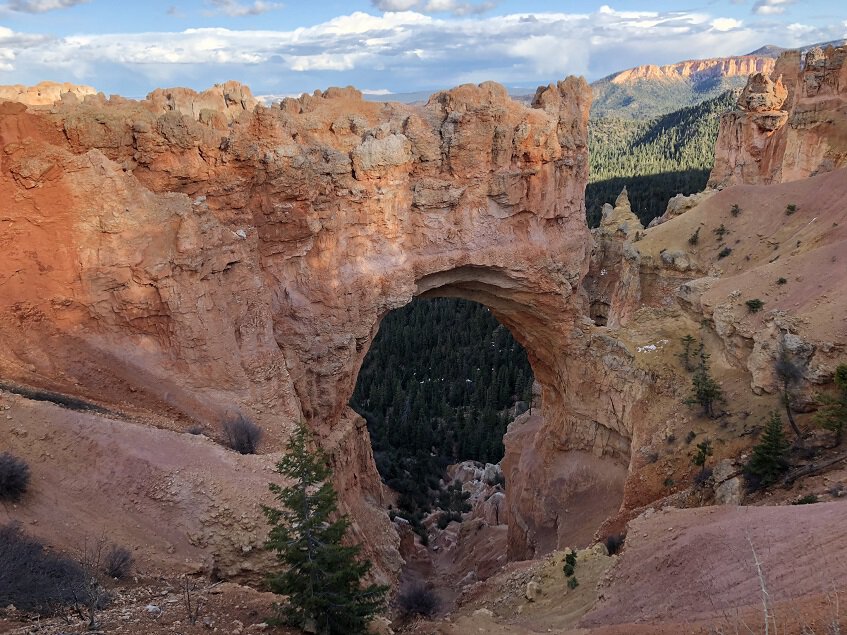
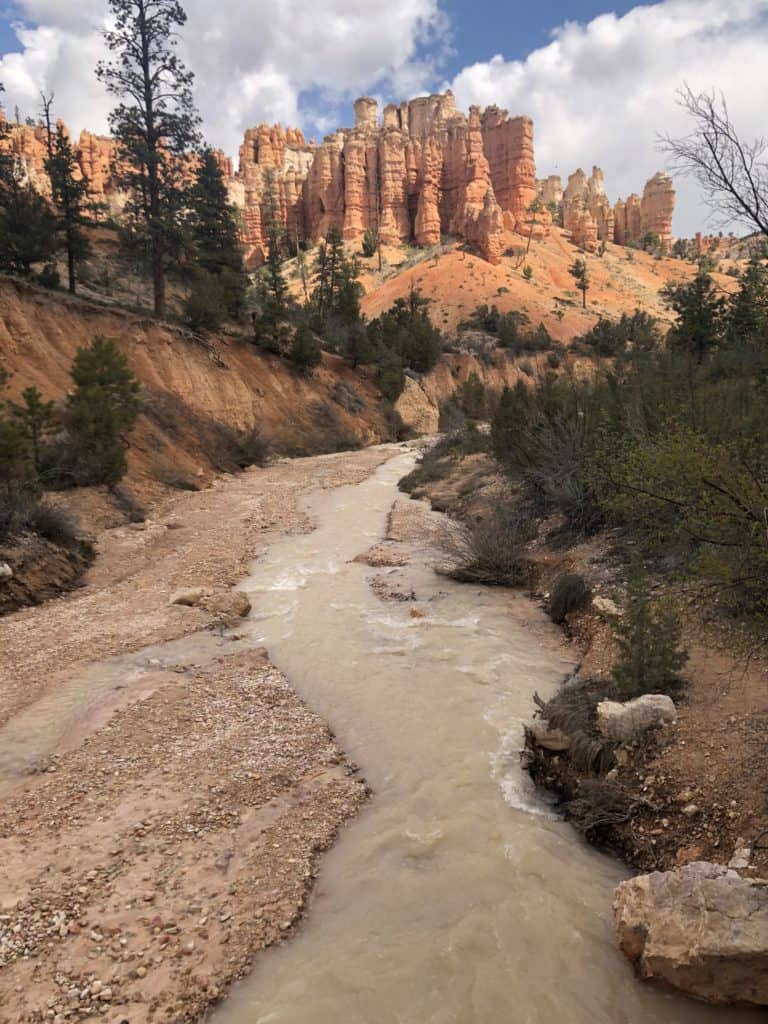
Mossy Cave Trail
We heard nice things about Mossy Cove Trail as being the only hike with a waterfall inside Bryce Canyon. Knowing we had reservations for horseback riding at 12:30pm, we left for Mossy Cove soon after breakfast.
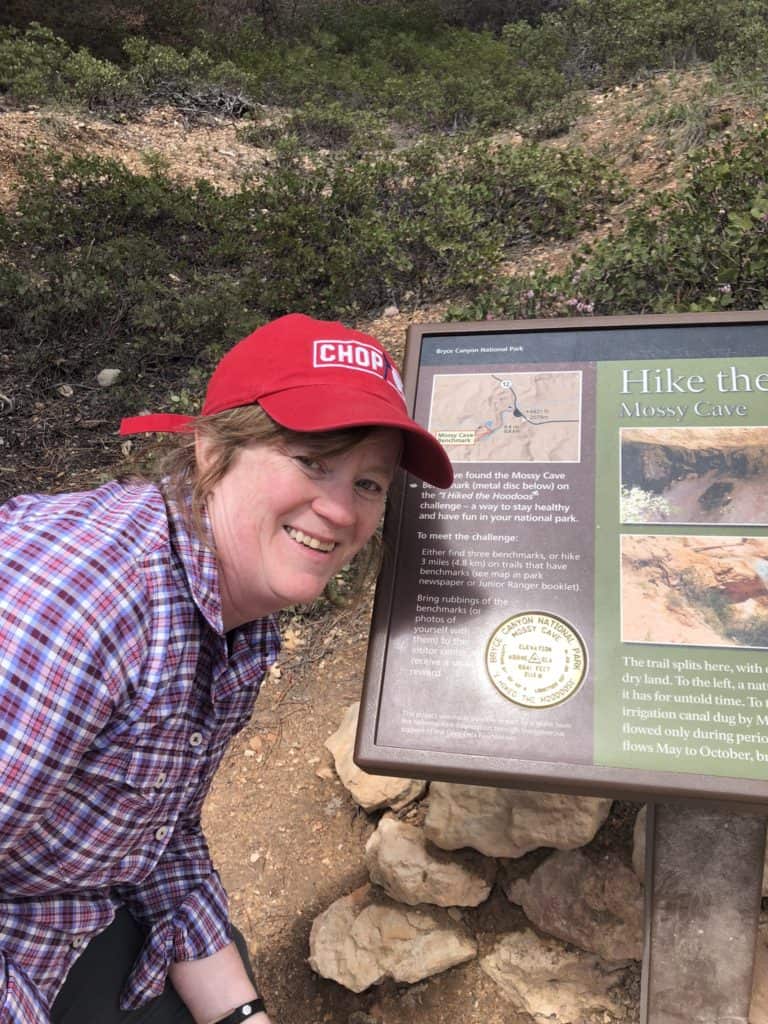
Mossy Cave Trail is located outside the more popular scenic drive. While it does take about 10 minutes to drive to the parking area, it is worth the drive.
The trail is an easy 0.8-mile roundtrip to the waterfall and cave. We also didn’t forget to take our picture with the benchmark for the Hoodoo Challenge!
Horseback riding
We ended up running late for the horseback riding as we didn’t realize check-in was 45 minutes prior to the trip start time. We were forced to skip lunch, but fortunately we each had a pack of crackers on it to hold us over.
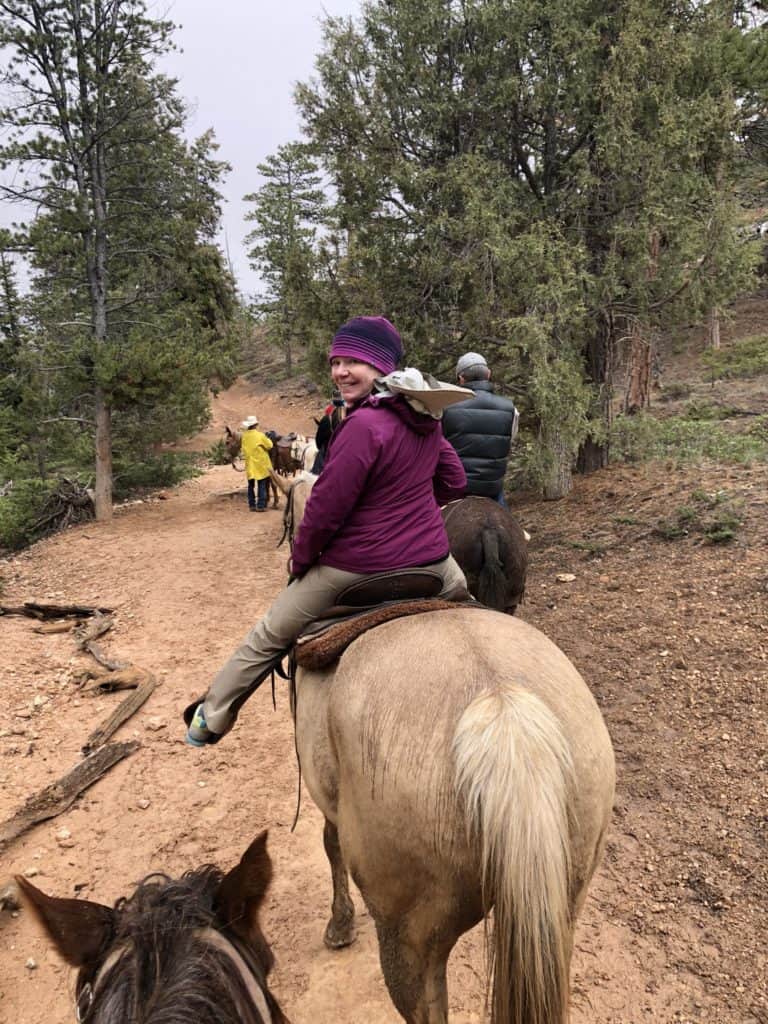
While there are several operations who have trail rides into the canyon, Bryce Canyon Trail Rides have the longest rides and you see more of the canyon.
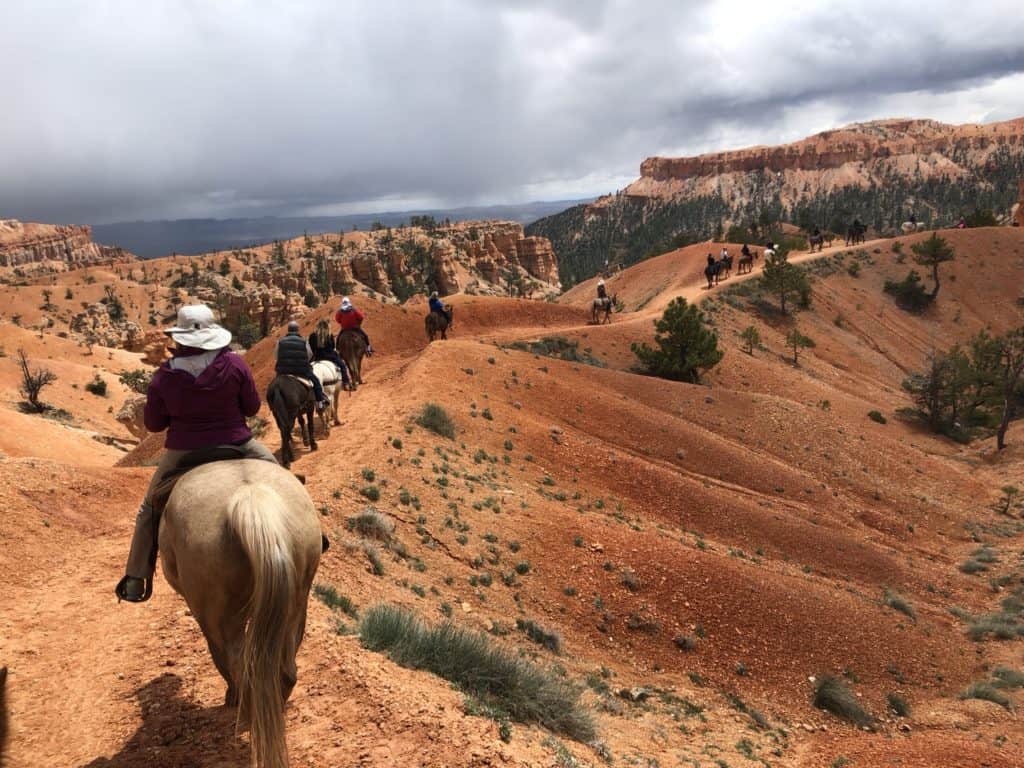
Our trip started just outside the Bryce Canyon lodge. The ride took us 8-miles into the canyon and lasted approximately 4 hours. While we were freezing the entire time, the ride was so gorgeous, it was easy to forget the cold for brief moments.
The scariest part was the instruction to let your horse guide the way. My horse, Hammer, liked to walk right along the edge of steep drop offs. I would just say “Hammer, how about we move over a little bit”, many times during the trip.
It did snow on us several times on our way down and the snow was a nice contract against the red hoodoos of Bryce Canyon.
Drive to Zion National Park
After the trail ride, we grabbed dinner in the restaurant located at the Bryce Lodge. It was nice to warm and fuel up before the drive to Zion National Park.
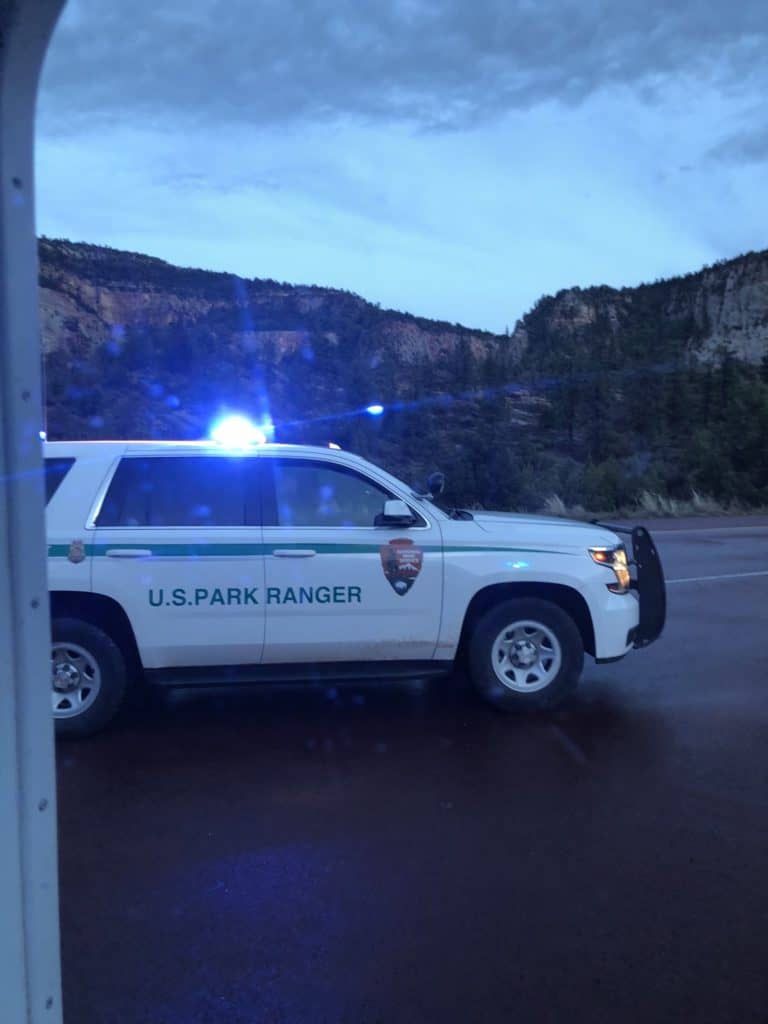
Arriving at Zion National Park, the entrance gate was officially closed as it was almost dark. We noticed a sign we knew we needed to read so we pulled over. Just as we did, the National Park Ranger came up behind us with the blue lights on.
We didn’t realize it, but we needed their assistance to travel through the Zion-Mt. Carmel tunnel. They instructed us to pull over just before the tunnel and wait for them to arrive.
Waiting about 30-minutes, the Rangers arrived and gave us instructions for traveling through the tunnel. We were to set our phone times for 3-minutes and then drive through the tunnel.
As we drove through the 1.1-mile tunnel, we knew it would have been gorgeous to make this drive during the day. But we enjoyed being the center of attention with the Ranger nonetheless.
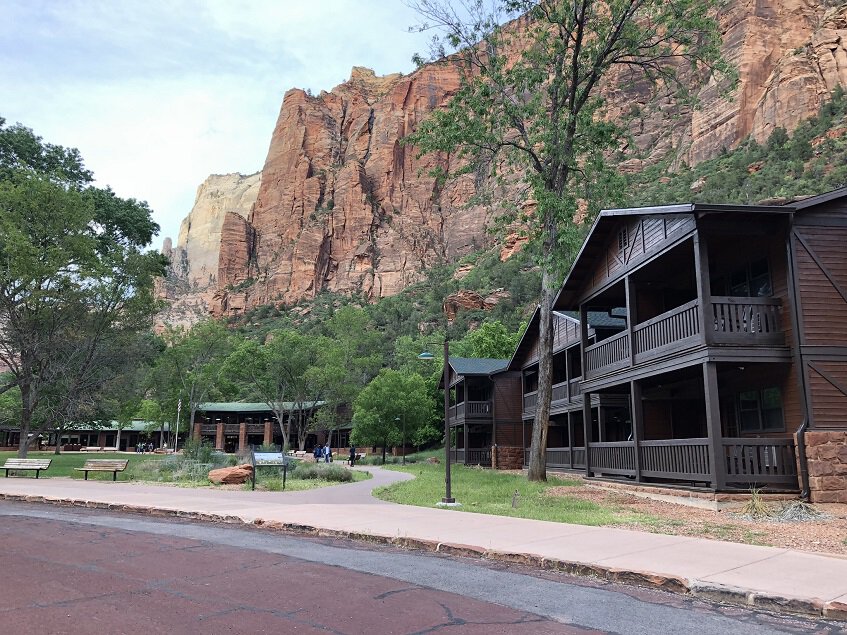
Checking into Zion Lodge
While it was a little sad our nights in the RV were over, but we were also looking forward to being in the Lodge for a good night sleep.
Day 8 – Zion National Park
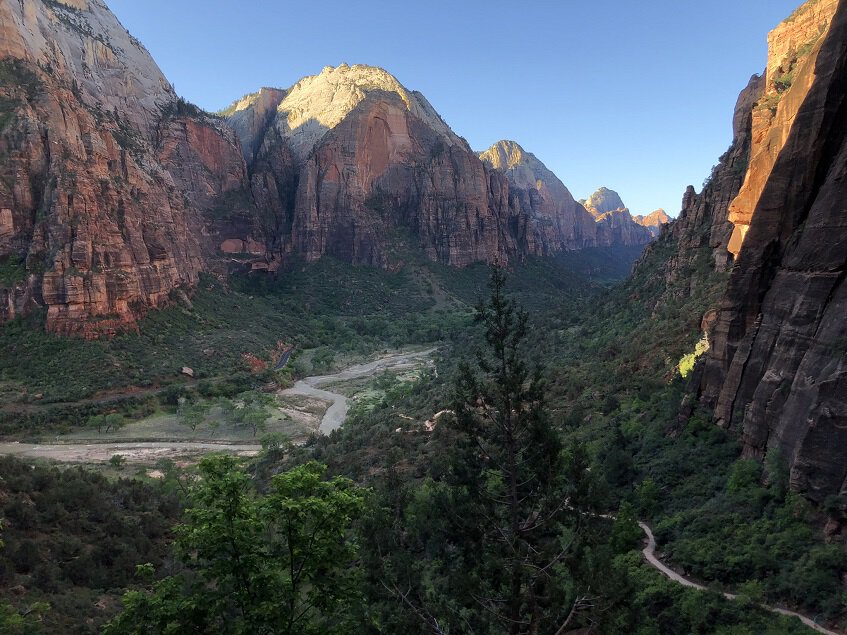
Waking up on our last full day in Utah, our main goal was to see as much of Zion as possible while working to fit in a hike to Angel’s Landing.
The weather was looking a little worrisome, so we started our day at the Visitor Center to discuss the Angel’s Landing hike with a ranger.
We decided to do as much of the scenic drive as possible via the shuttle bus and save Angel’s Landing for Saturday morning.
Exploring Zion National Park
The shuttle bus system at Zion is top notch – they are moving up and down the scenic drive continuously which allows you to pack in as much into one day as possible. We decided to take it to the last stop and start our day there.
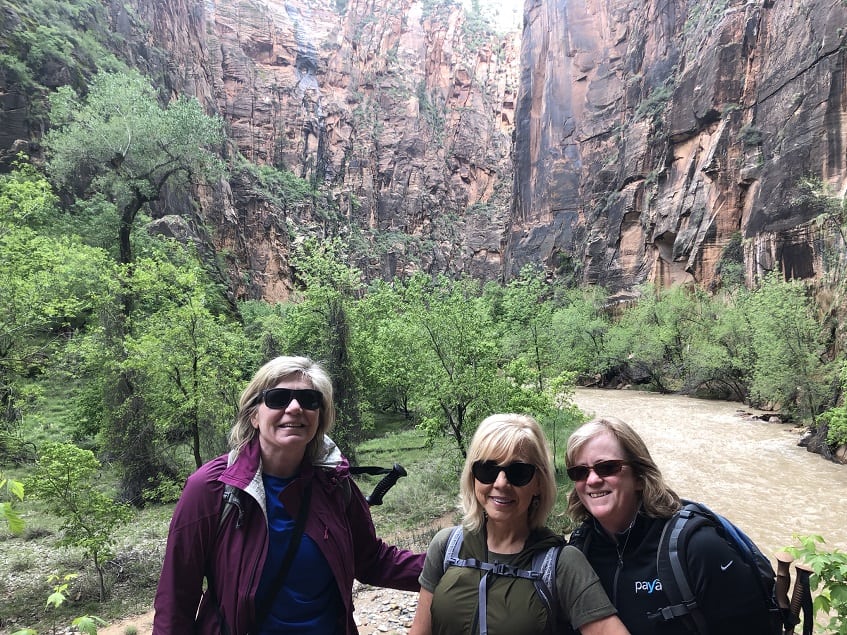
Riverside Walk
We took the Zion Shuttle to stop #9, Temple of Sinawava, for an easy stroll down Riverside Walk. Riverside Walk is probably one of the easiest, most popular and scenic trails in the park. The path is paved and follows the Virgin River through a narrow canyon. If enough water is running, there is a high waterfall at the beginning of the trail.
This is also the connecting trail for The Narrows, another popular hike. We really wanted to do The Narrows but it was closed due to the water level during our visit.
Tip: Since this is an easy trail, be prepared for large crowds especially during peak seasonal times.
Weeping Rock
Back on the shuttle bus, we went 2 stops to Weeping Rock, shuttle stop #7. The hike up to the rock is a short 0.2-mile hike, but it is a little steep and was very slippery!
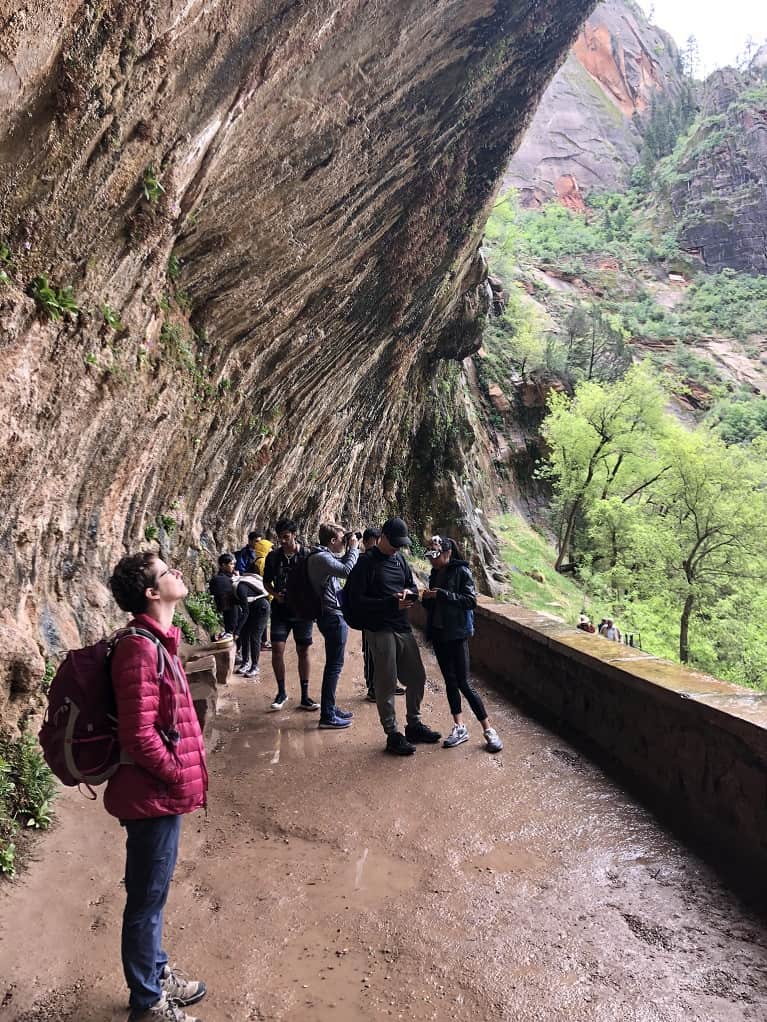
This was worth the stop, seeing the beauty of the water coming from the rock.
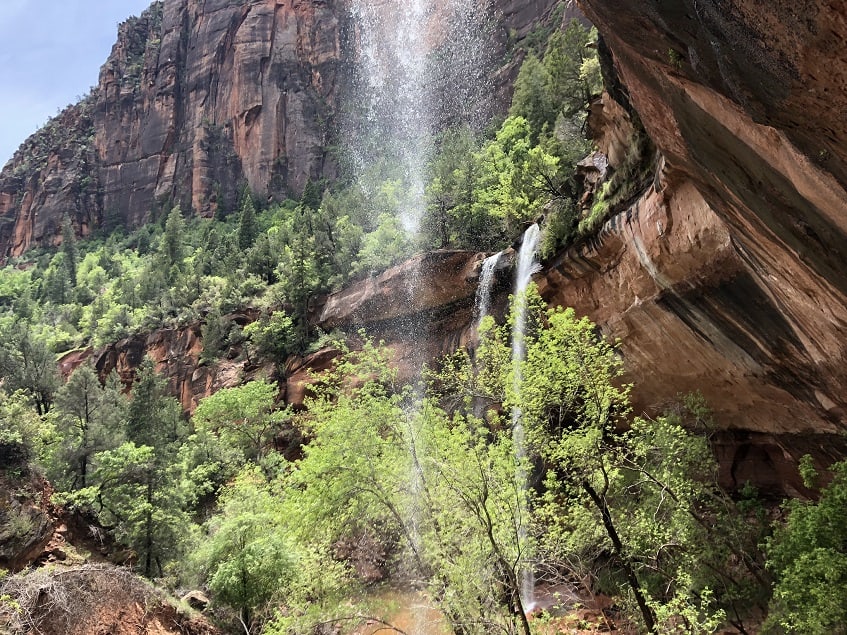
Lower Emerald Pools
After a quick lunch at the Zion Lodge, we walked across the street to the trail for Emerald Pools. This was a short hike of 1.2-miles to Lower Emerald Pools. It was a very scenic route with the end placing you directly behind the falls. We continued until we were completely around the falls (until the trail ends) to get different views of the falls and canyon.
Typically, we would have done Upper Emerald Pools, but it was closed
Tip: Be extremely careful as the trail does get wet and slick!
Pa’rius Trail
Back on the shuttle, we went to shuttle stop # 3, Canyon Junction for the Pa’rius trail. This is a paved path where you may see wheelchairs, bicycles, rollerblades and more. However, this Zion trail is very flat and quiet. It isn’t one of the highly traveled trails, so this is a must if you are looking to avoid some of the crowds.
We took this trail to the Museum, where we watched the National Park video on Zion.
Open air tram tour
It was now time to make our way back to the lodge as we had purchased tickets for the early evening tram tour. While it went to many of the same stops, we had seen earlier in the day, there was no time for walks or hikes. The best part is we heard stories from our tour guide which we hadn’t heard or read during our exploration earlier in the day.
Only have 1 day at Zion National Park? Here’s a nice itinerary for one day at Zion Canyon National Park!
Day 9 – Zion National Park
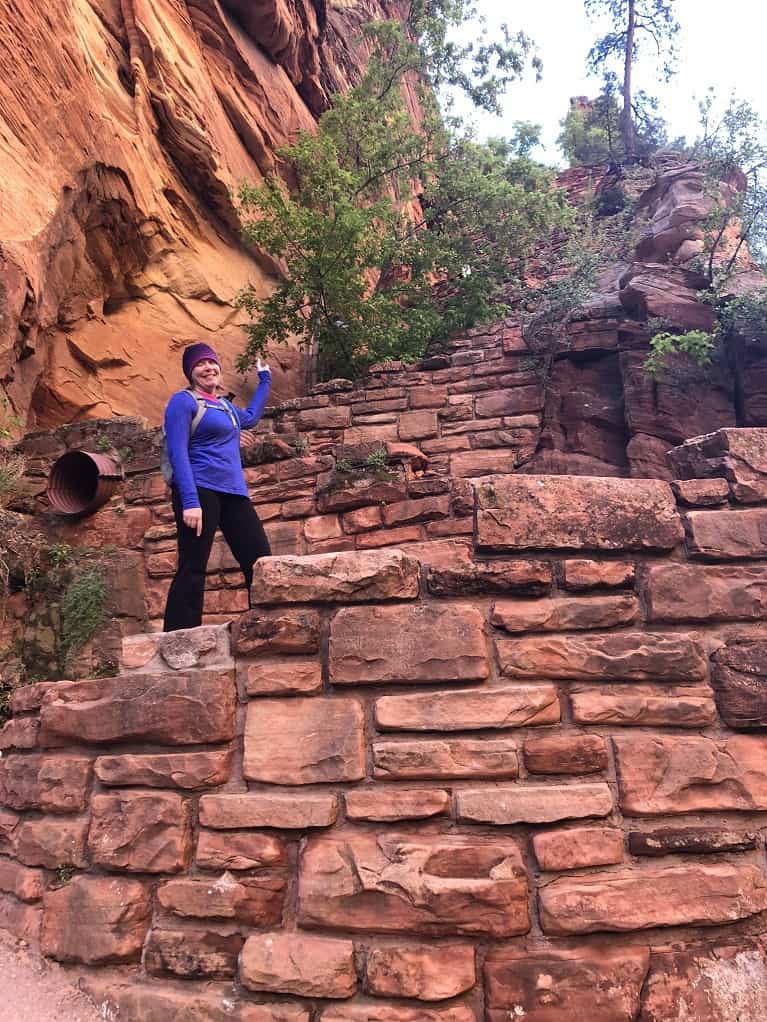
Angel’s Landing hike
Our alarm went off at 6am Saturday morning, so we could start our hike between 6:30-6:45am. We planned to walk from Zion Lodge to the Grotto Trail in order to start the hike before the shuttle buses started running.
Right on time, we walked out of the lodge just after 6:30am. As we approached The Grotto, we heard a familiar sound of a turkey. We looked to our left and there he was with all his feathers poofed out!
The hike
Angel’s Landing is a strenuous hike of 5.4 miles roundtrip climbing almost 1500 feet in elevation to the top of the canyon.
Once we reached the top of the first set of switchbacks, we looked down into the canyon and saw the first bus arrivals! When we saw the crowd, we knew we had made the right decision.
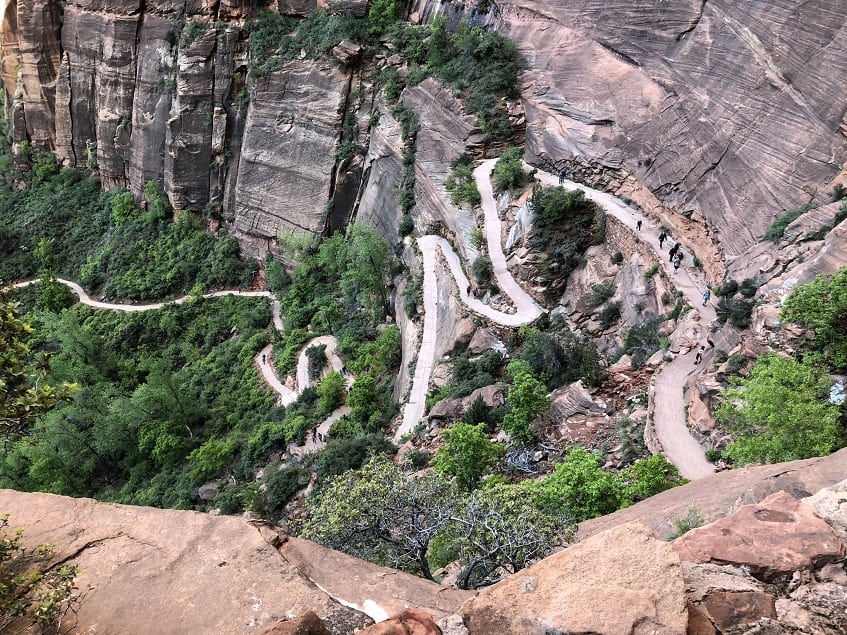
Continuing to climb, we walked through the canyon walks until we reached the bottom of Walter’s Wiggles. It wasn’t quite as I had imagined as I didn’t imagine them being so short! We would walk a few and then catch our breath, walk a few and then catch our breath again until we made it to the top.
We finally reached Scout Lookout where we took in the view for just a few minutes. Since the first set of chains were not crowded, we decided to start along the chains and see how far we would get.
Reaching the next overlook, we looked up to see what was ahead for us. It was a little too steep for us, but we used the excuse of “not enough time” to keep moving toward the final Angel’s Landing lookout.
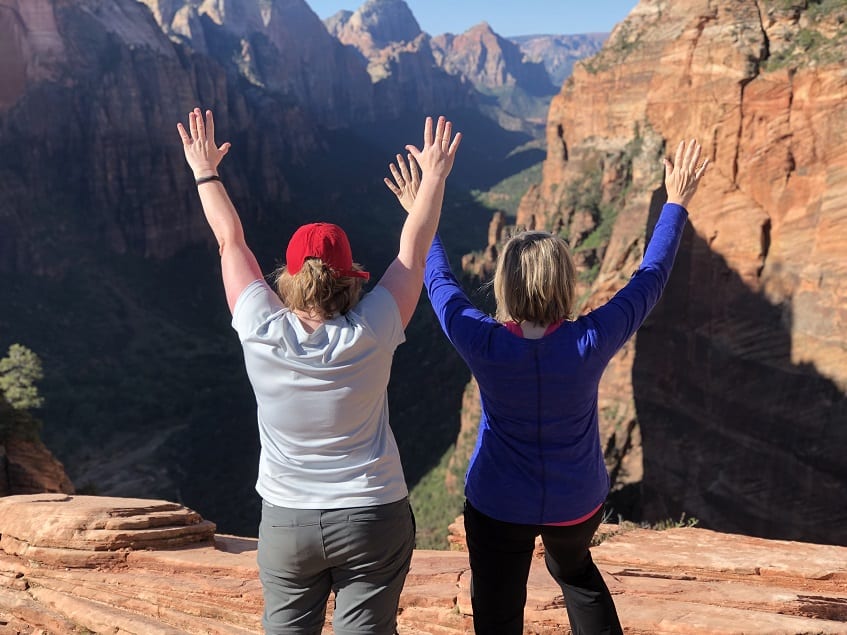
Turning around, we made our way back down the first set of chains only to be taken back by the line of people waiting to go up!
After we were back down in the valley, we already made our decision to come back for the final leg of Angel’s Landing and The Narrows!
Want to avoid the chains, stop at Scout Lookout which is 3.8 miles roundtrip. Remember, most would say this is the best hike at Zion! You should expect the hike to Angel’s Landing to take you approximately 4-5 hours depending on the crowds and how far you go.
Saying goodbye
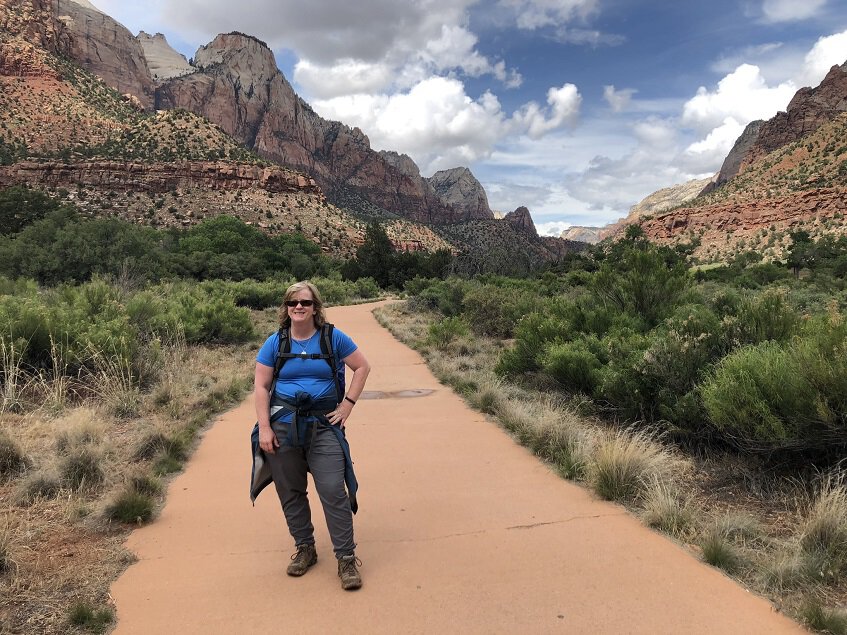
We grabbed a quick bite from the lodge, before saying goodbye to Zion and heading out for Las Vegas.
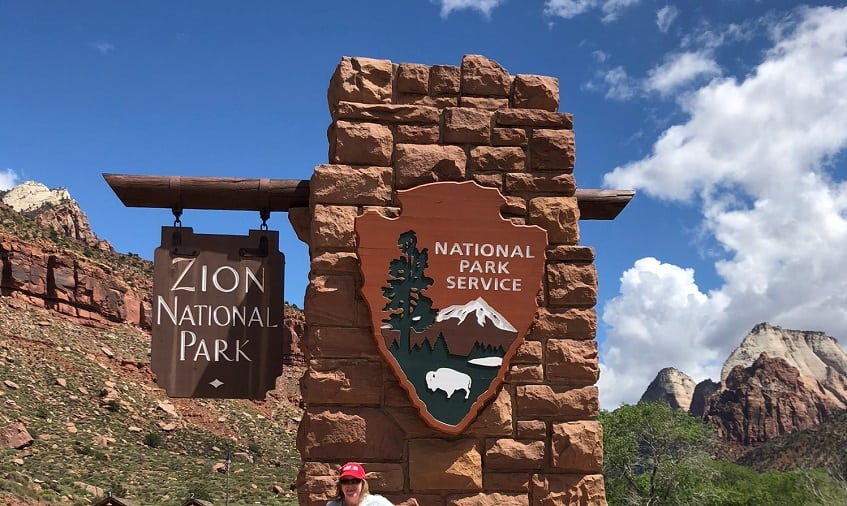
One last stop at the Zion sign for our obligatory picture!


9 thoughts on “Exploring Utah’s Big 5 National Parks”
Wow! So beautiful! I’ve long wanted to explore those parks and an RV seems like the way to go. Definitely on my list.
I plan to do this exact trip, minus an RV, in summer. Thanks for all the tips. The pictures backed up my desire to get there and soon!
Such amazing national parks. We want to head back to the US to tour the national parks so thanks for the tips and the reminder to get planning!
What an awesome looking trip! I woudl looveee to go over and hike Utah! I’ve spent some time in Arizona which is amazing and know Utah is nothing less. I loved that you went riding! Even though I grew up riding horses I’d still pay to see places from the saddle. Saving this for my future planning 🙂
What an amazing trip! I visited Zion, Bryce and Arches in August and I think I would prefer to go back at a cooler time of year! I still need to tackle Angels Landing after I had heat stroke and couldn’t hike there…. so that’s a good excuse to go back!
Heat stroke! Wow that sounds terrible. We didn’t make it all the way and I want to go back to finish it. I also want to hike The Narrows.
What an amazing journey! I’ve only been to Zion so far so I need to return to Utah so see the rest. Angels Landing was a memorable hike but I want to see more.
There is so much to see in Utah! Thank you for putting together a very comprehensive guide which has tons of fabulous information
I love this!! You started north and hit all the northern parks I missed (I hit Bryce/Zion). I did a 360 road trip out of Vegas hitting the southernmost parts. I’m long overdue to go back for round 2.